Getting Started With DNSimple
Table of Contents
Prefer to watch? Try our video tutorials:
Introduction
This how-to guide shows you how to accomplish basic tasks with DNSimple. Our services are streamlined and make managing your DNS, domains, and certificates straightforward with our simple interface and powerful tools.
We recommend having this guide open alongside your DNSimple account so you can follow along. When you’ve completed this, you will be able to register, transfer, and set up DNS for your domain. If you don’t have an account, check out our plans to register and follow along.
Note
The process for registering, transferring, or managing DNS for domains is the same for a Solo or Teams account.
Before you skip to a section, let’s go over how to navigate the main interface of the dashboard.
To get to the dashboard, log in to your DNSimple account, and you will be brought to it. If you haven’t created an account yet, make one, then select Skip to dashboard at the bottom of the Get started page.
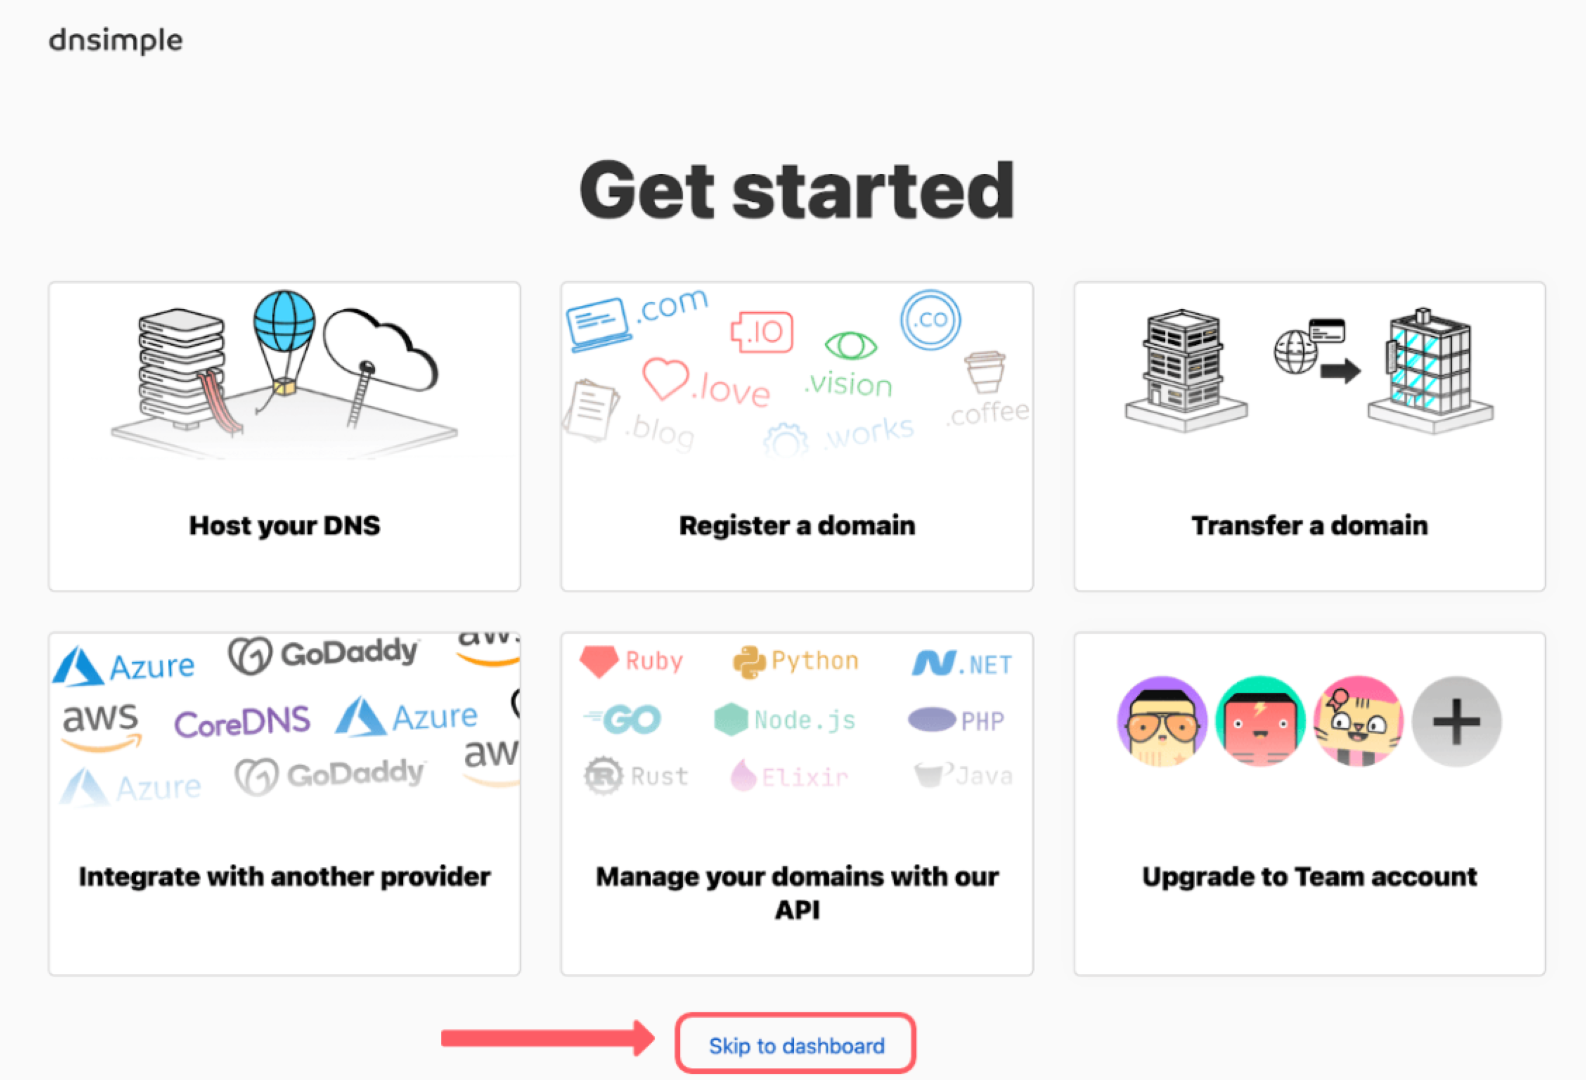
The dashboard gives you an overview of your DNS, domains, and certificates through DNSimple and brings you to where you manage them.

Note
This shows a dashboard with multiple accounts, but you can still follow along with just one.
If you don’t have a domain yet, try transferring or registering a domain.
Have a domain and want to set up DNS? Learn how to add DNS records to your account.
Adding domains to DNSimple
Domain management on DNSimple starts in two ways: registration and transferring. A domain is registered if it isn’t already owned. It’s transferred if you already own the domain through another registrar.
Registering a domain
How do you register a domain? Registering a domain is the first step to an online presence. This is best if you don’t have a domain already, as you need a domain to set up DNS services.
Note
You do not have to register your domain through DNSimple to use our services. Try adding DNS to a domain you own through another registrar.
-
Navigate to the DNSimple Dashboard. Click Add at the top right, then navigate to the Register domain option in the dropdown.

-
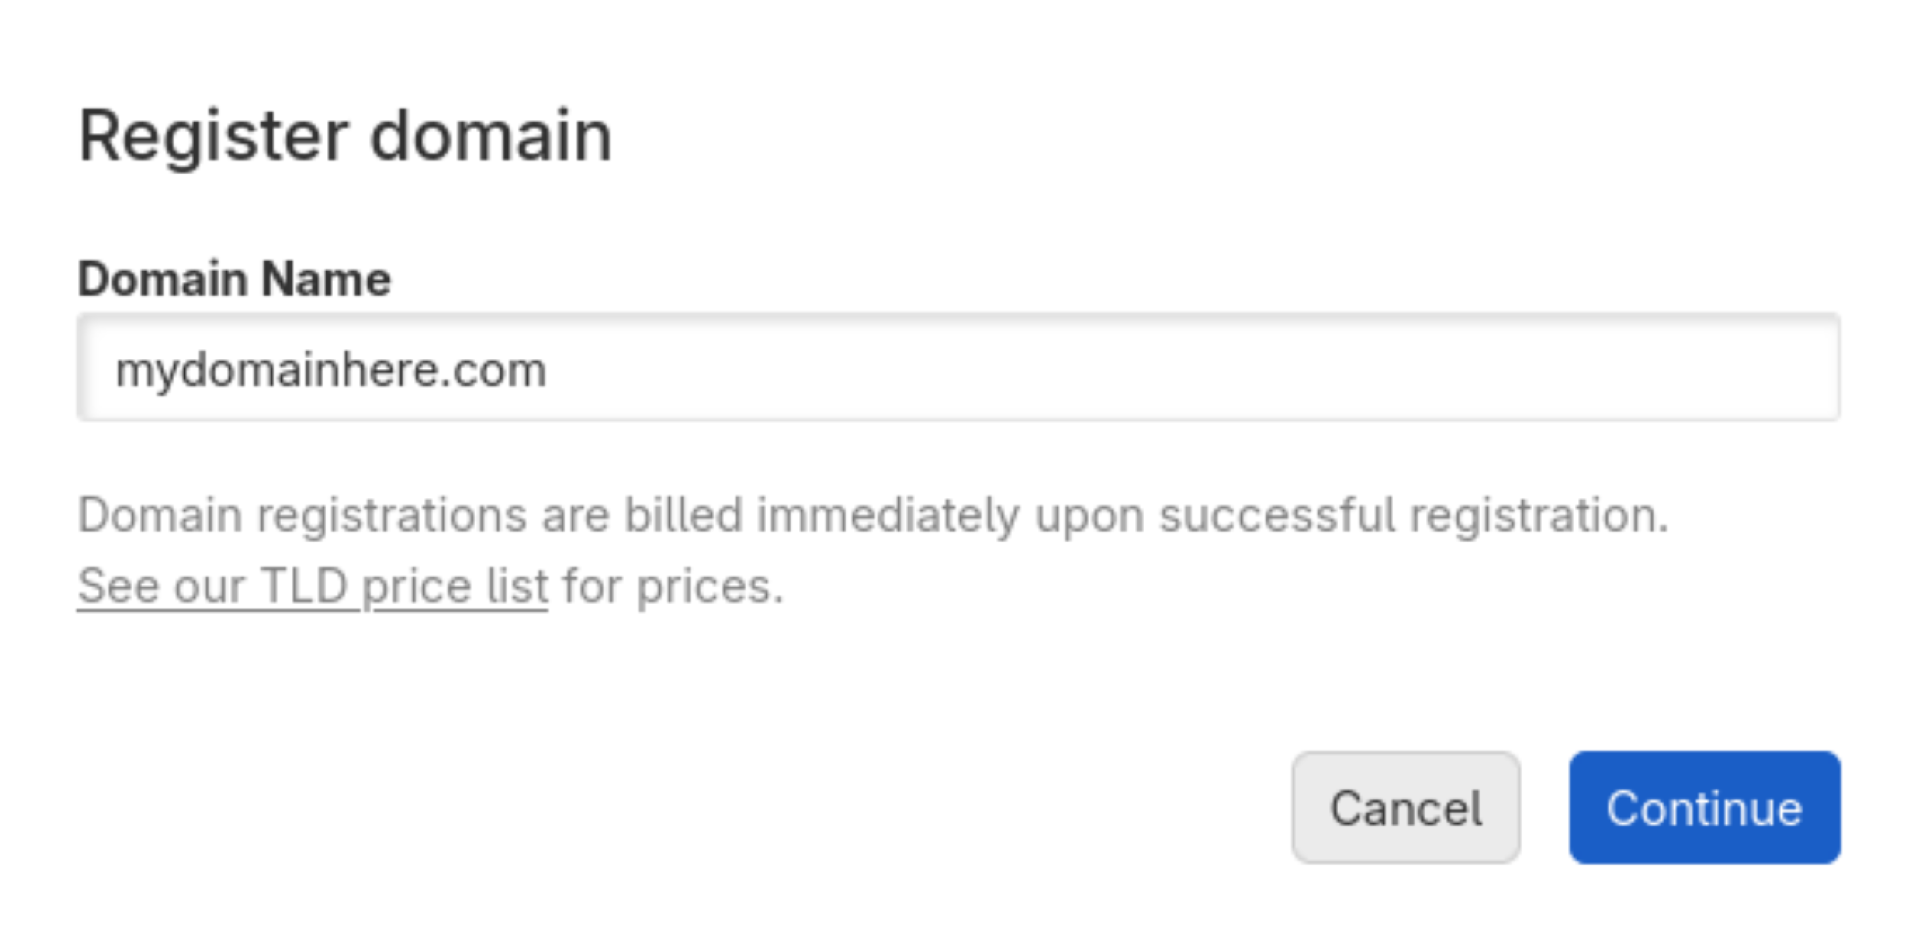
On the Register domain page, enter the domain name you want to register. Once you are satisfied with your domain, click Continue.
-
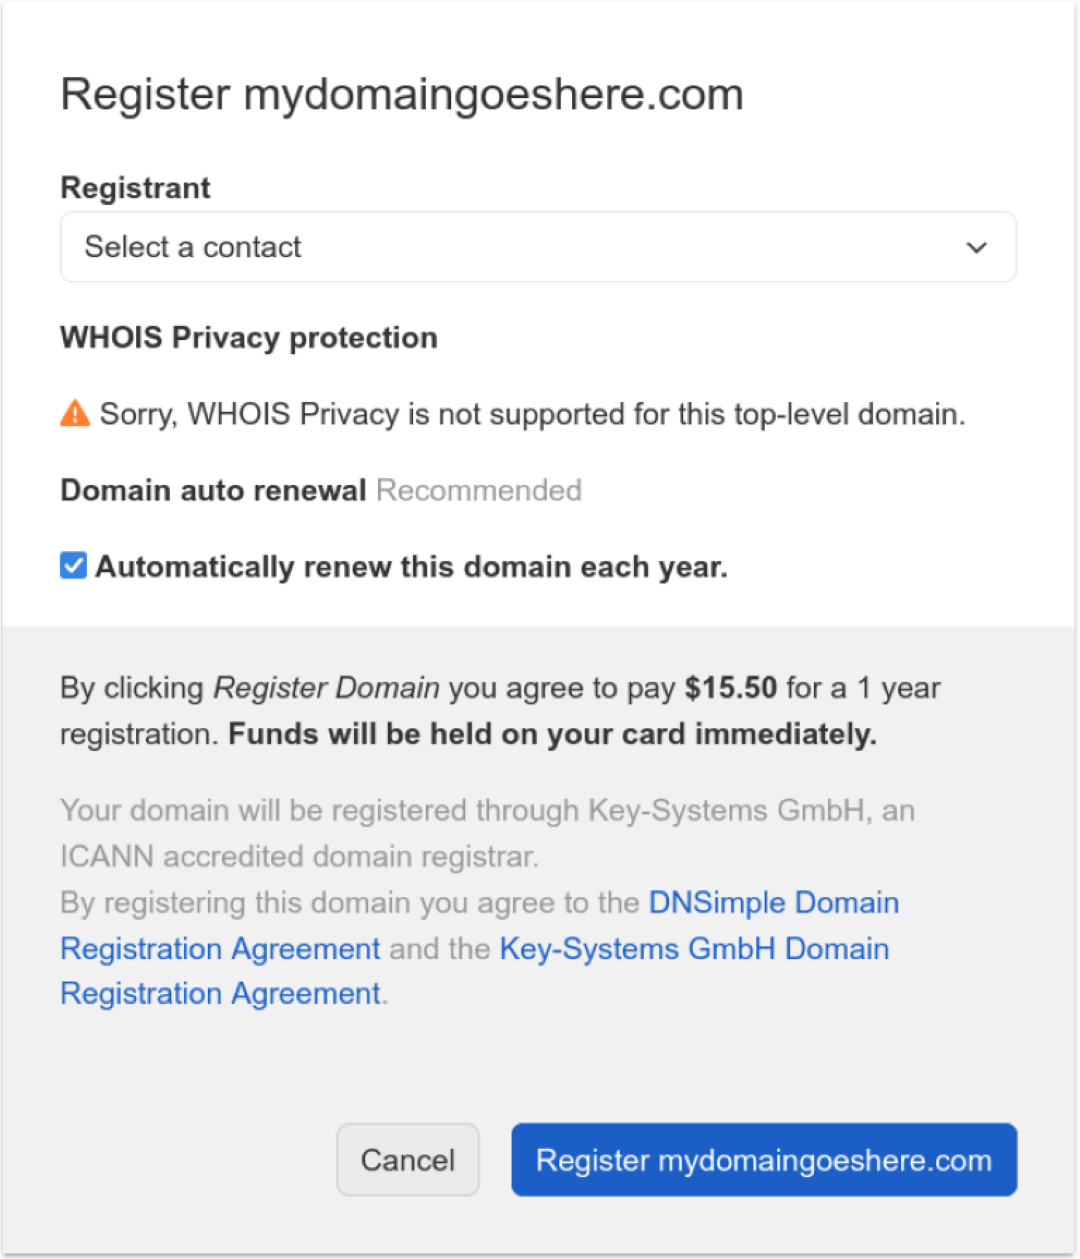
Enter your contact information, or select a contact from the dropdown list. Finally, click Register ____ to complete your registration.
You just registered your domain successfully.
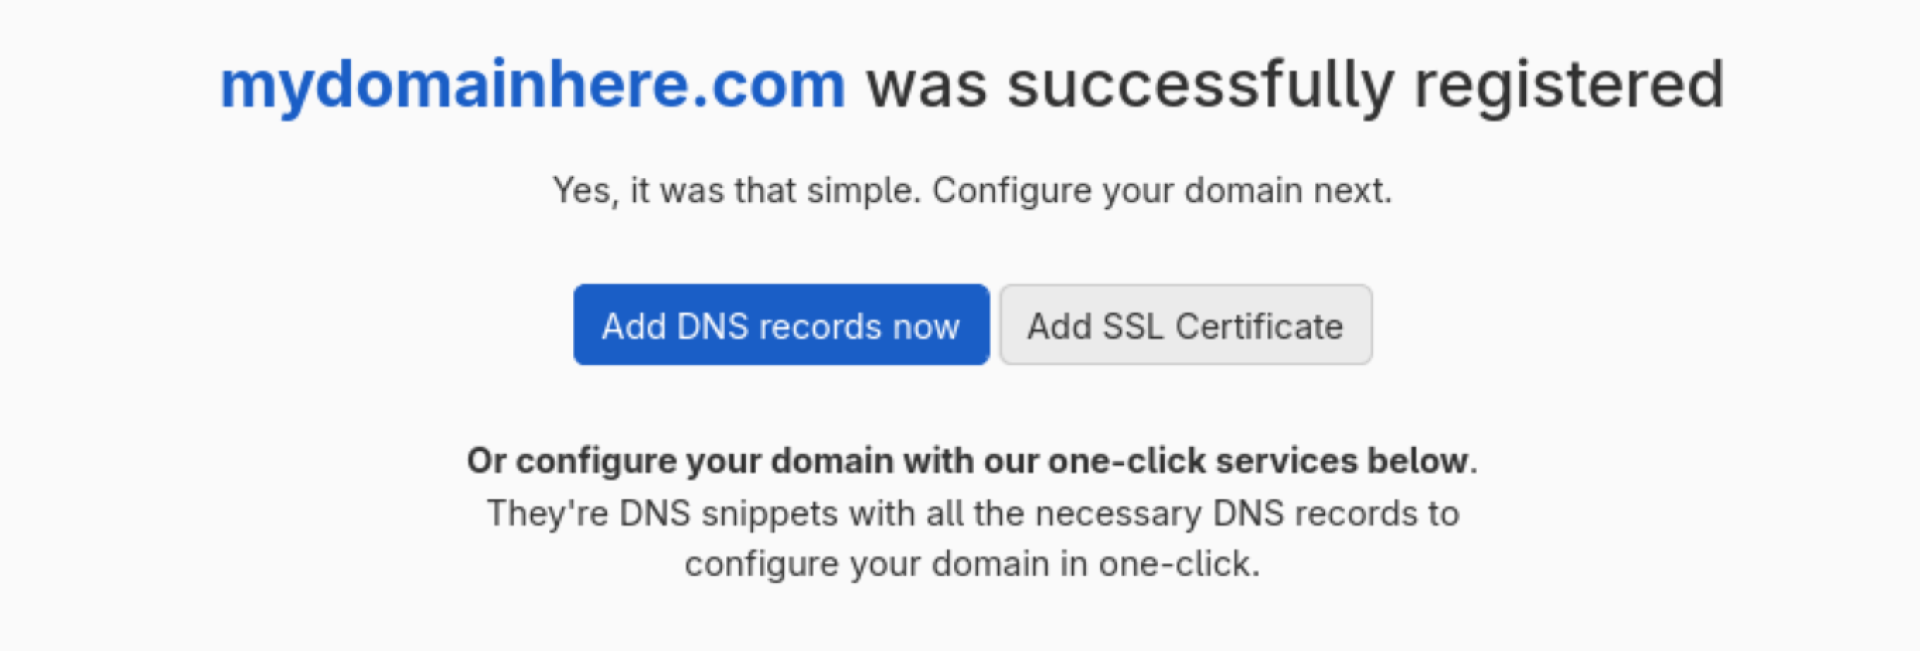
Now that you have your own domain, try adding DNS to get your site running.
Transferring a domain
How do you transfer a domain? Transferring a domain is recommended when you already own a domain through another registrar.
Note
A domain transfer requires access to the registrar the domain is registered to in order to obtain an authorization code.
-
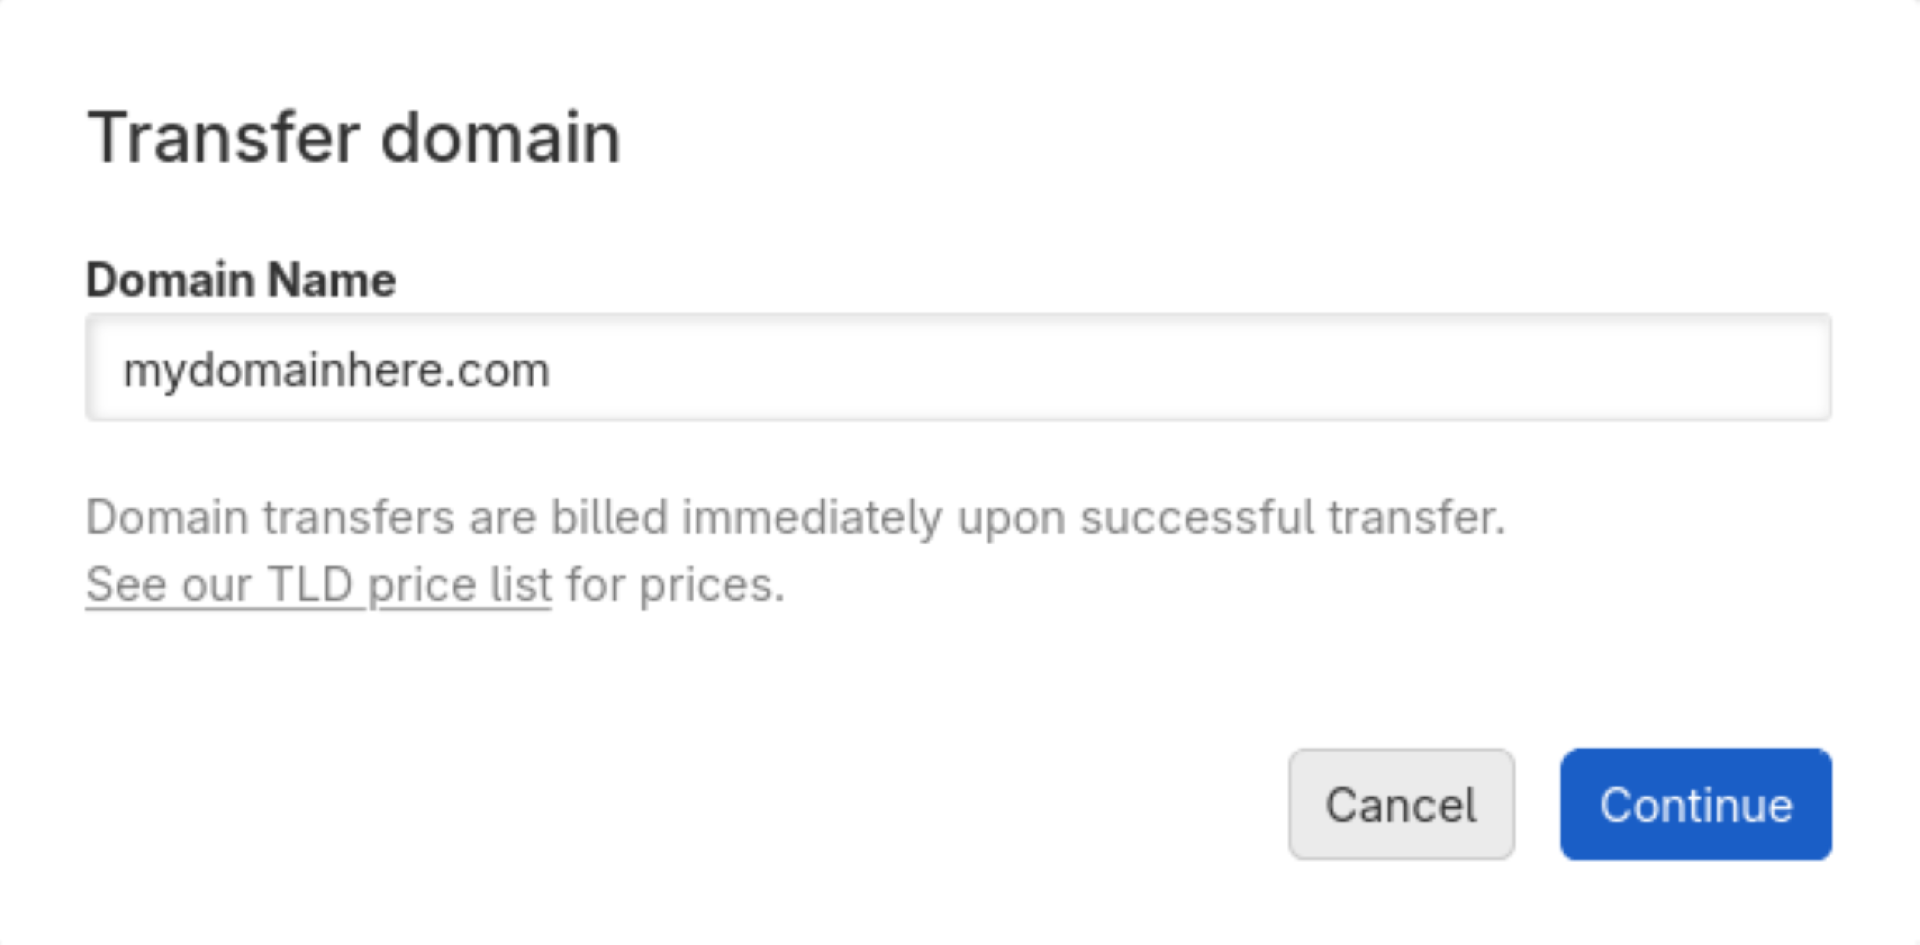
Navigate to the DNSimple Dashboard, click Add, and choose Transfer domain from the list of options.

-
Enter your domain name in the form, then click Continue.
-
Follow the requirements for the transfer process on your current registrar’s site, then enter your authorization code and registrant information. Once you are ready, click Register ____ to start the transfer process.
[!NOTE]
Not all TLDs require an authorization code and might require special conditions (typically .uk or other country code TLDs). In that case, follow the instructions for that domain.[!TIP]
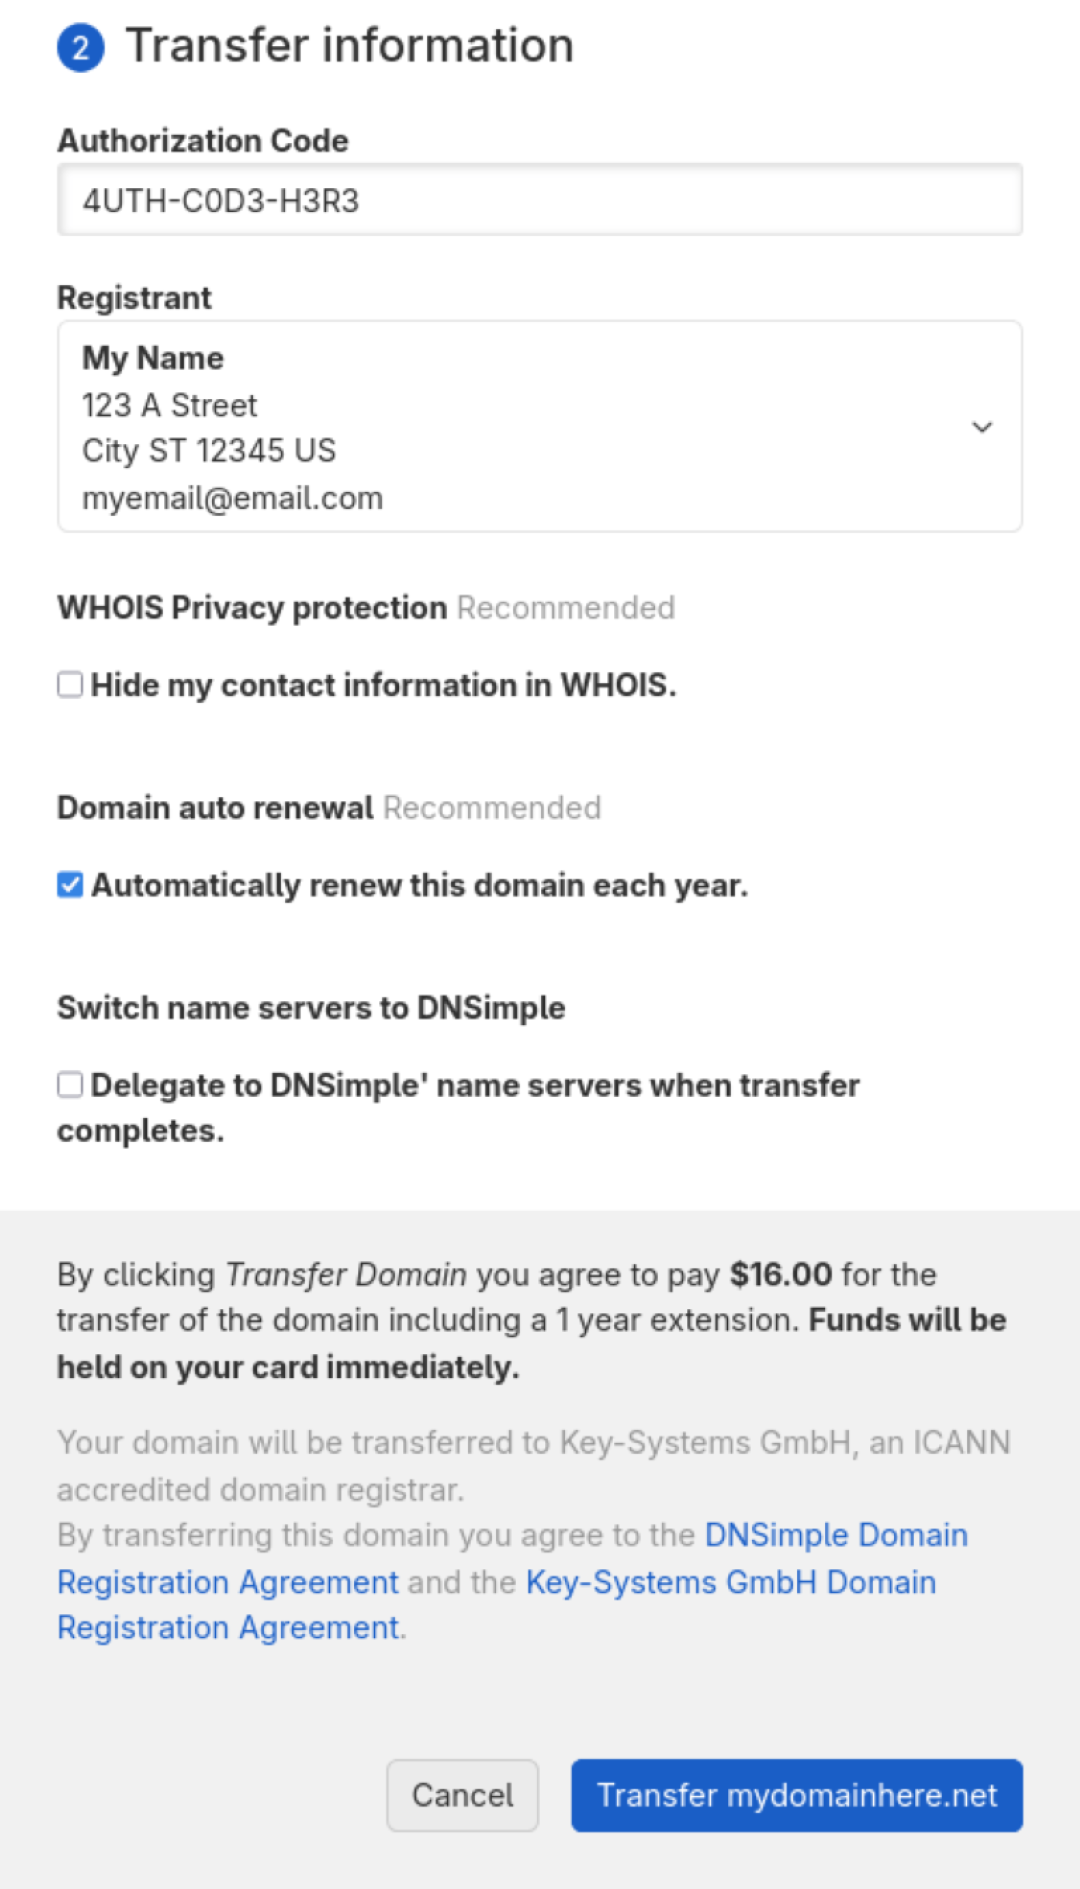
If your domain supports it, enable our WHOIS Privacy Protection. This hides your contact information from any look-ups.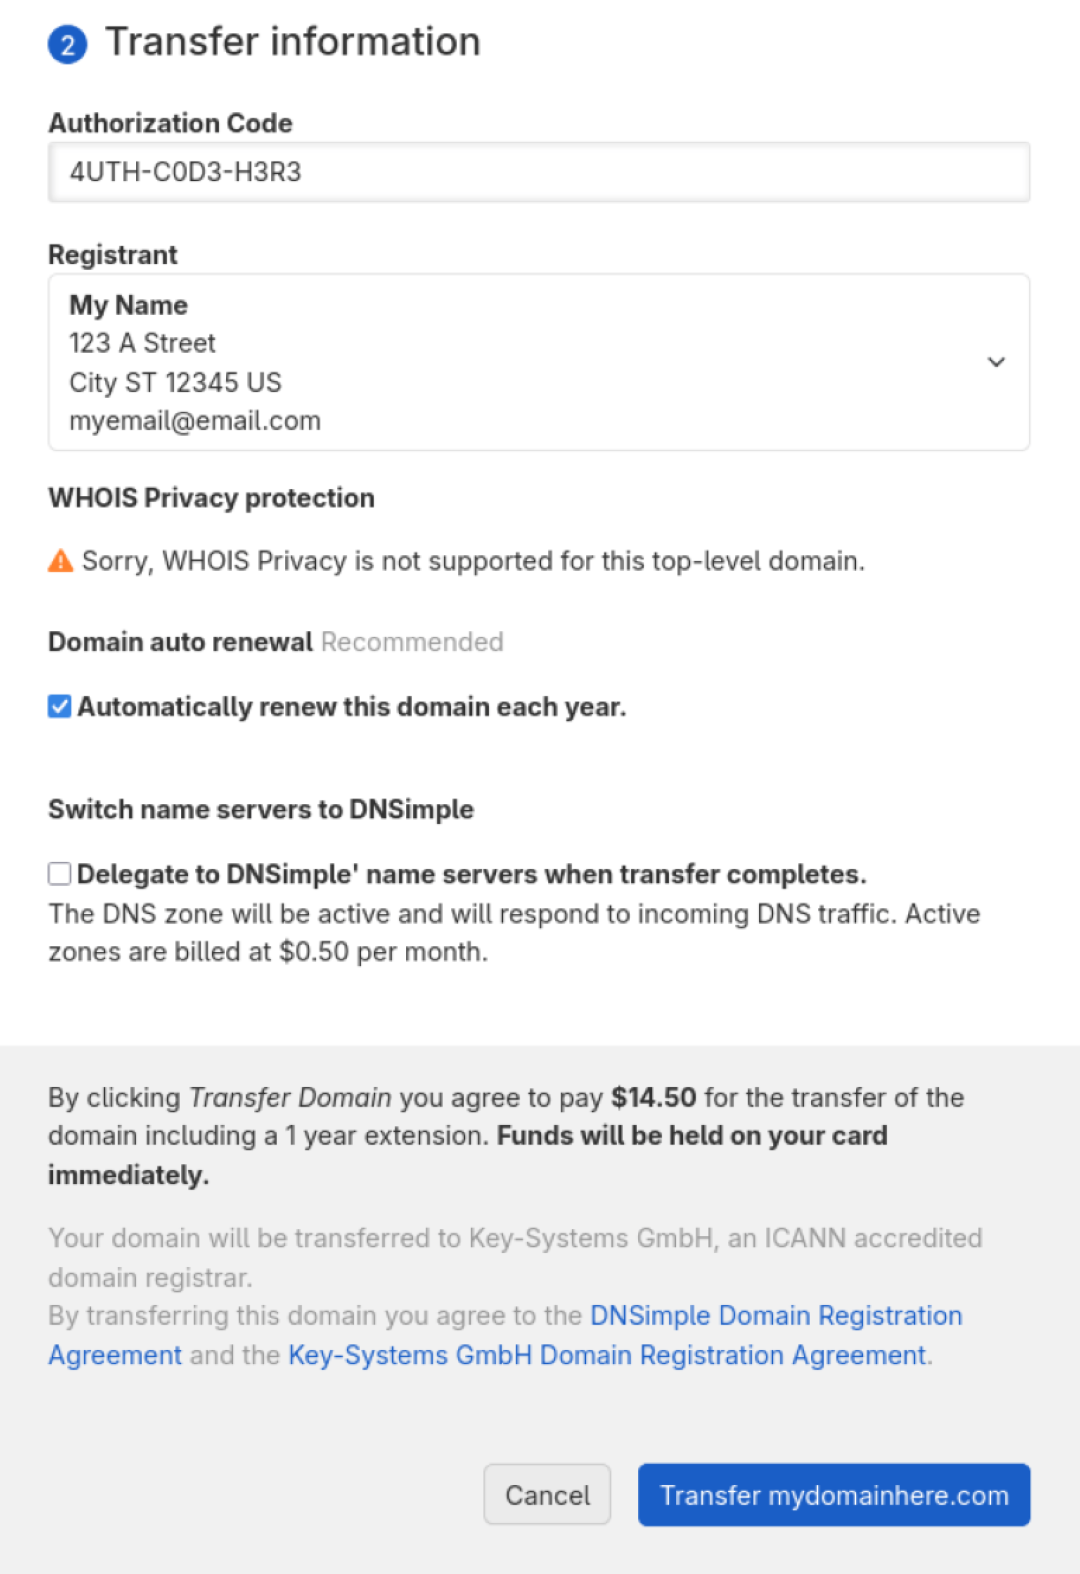
An example of a TLD that allows WHOIS Privacy Protection:
-
The transfer process will be started, and you should be able to start setting up DNS records for when it is transferred. Try setting up DNS.
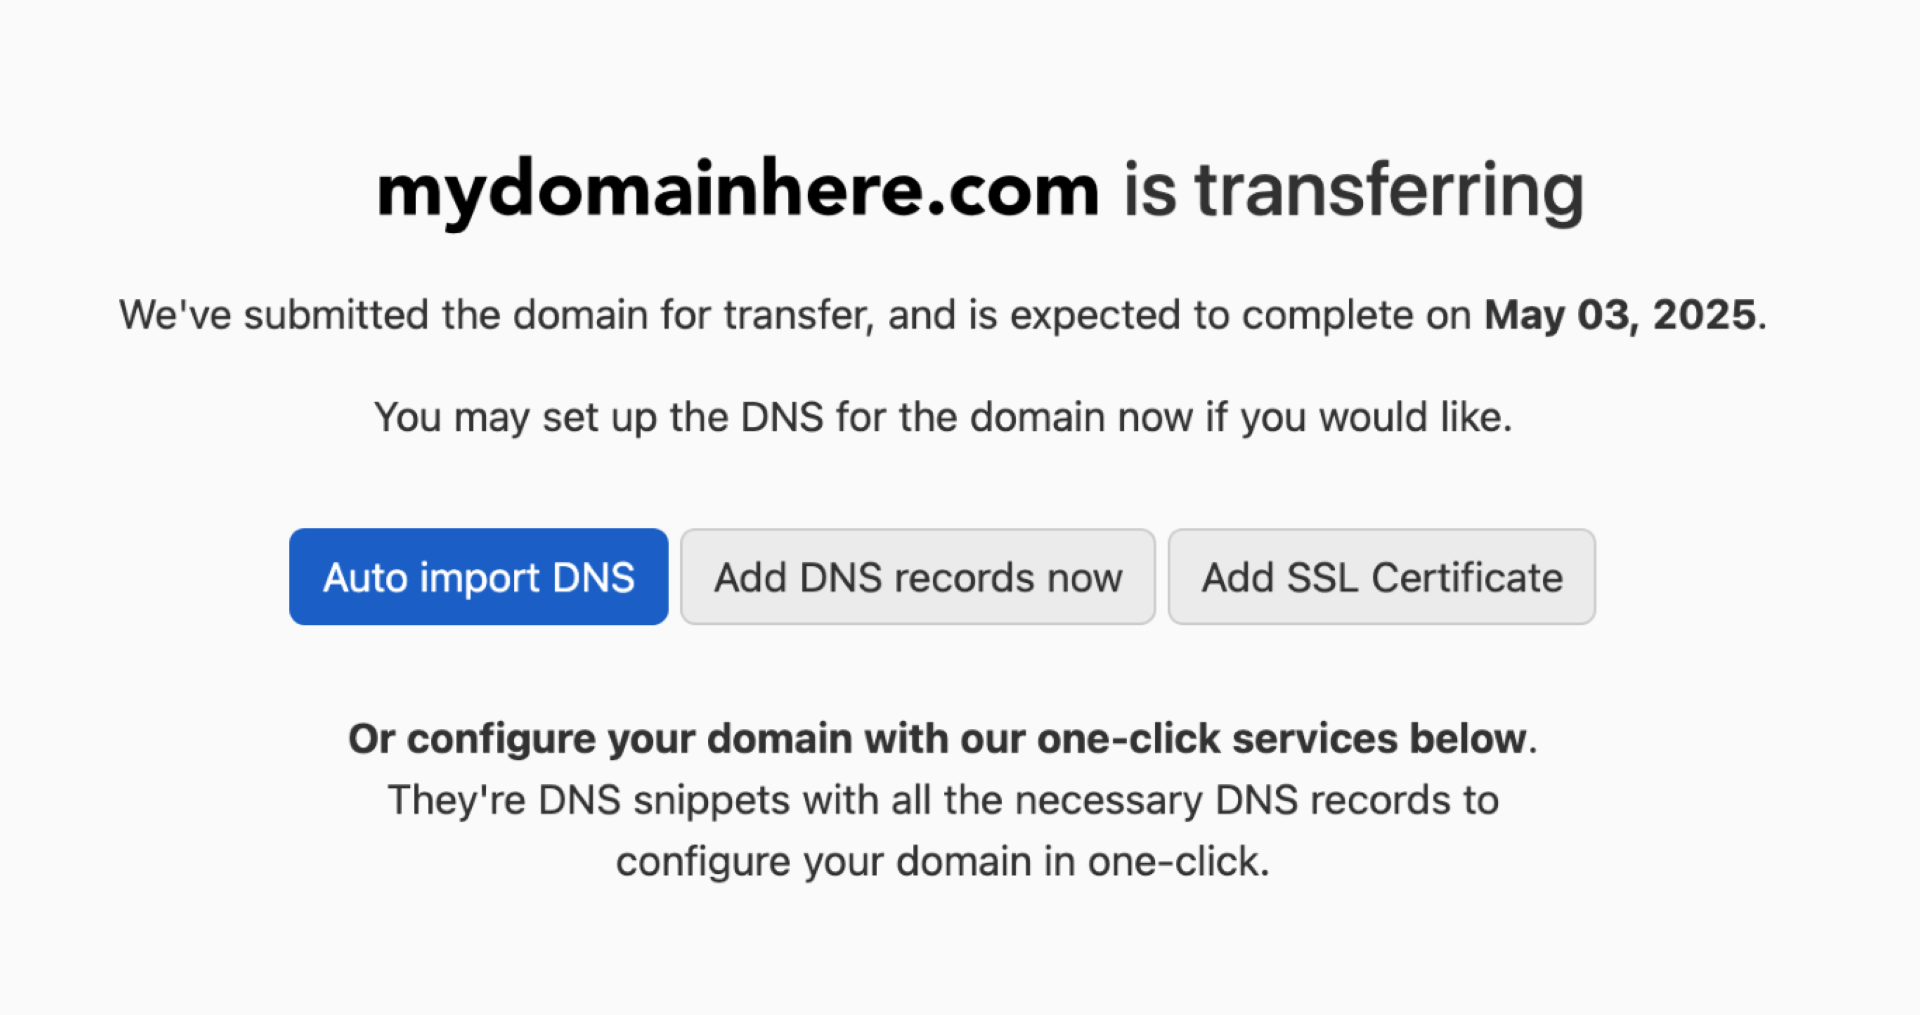
That’s it — you just transferred your domain to DNSimple.
The transfer process will take anywhere from 5 to 7 days. During this time, you can check the status of it on your domain’s management page. If your domain’s name servers are pointed to ours or another DNS provider with records, your domain will continue to operate during this time.
Host DNS on DNSimple
Warning
Hosting DNS is required to resolve your endpoint from your domain, and requires a domain. If you don’t have one, try registering a domain with DNSimple or transferring one you own.
Setting up a DNS record
How do you host DNS? Setting up a DNS record is the fundamental step to hosting DNS and is what is used to resolve your domain. What DNS records should you add? Try looking at common DNS records to see what your setup might look like.
Adding DNS to an internal domain
If you have a domain registered through DNSimple, follow these steps to add DNS records for your domain.
-
Navigate to the DNSimple Dashboard, then click Registered Domains under your account.

-
On the Domain Names page, search for the domain you want to add DNS to. Click on it to open the management page for that domain.
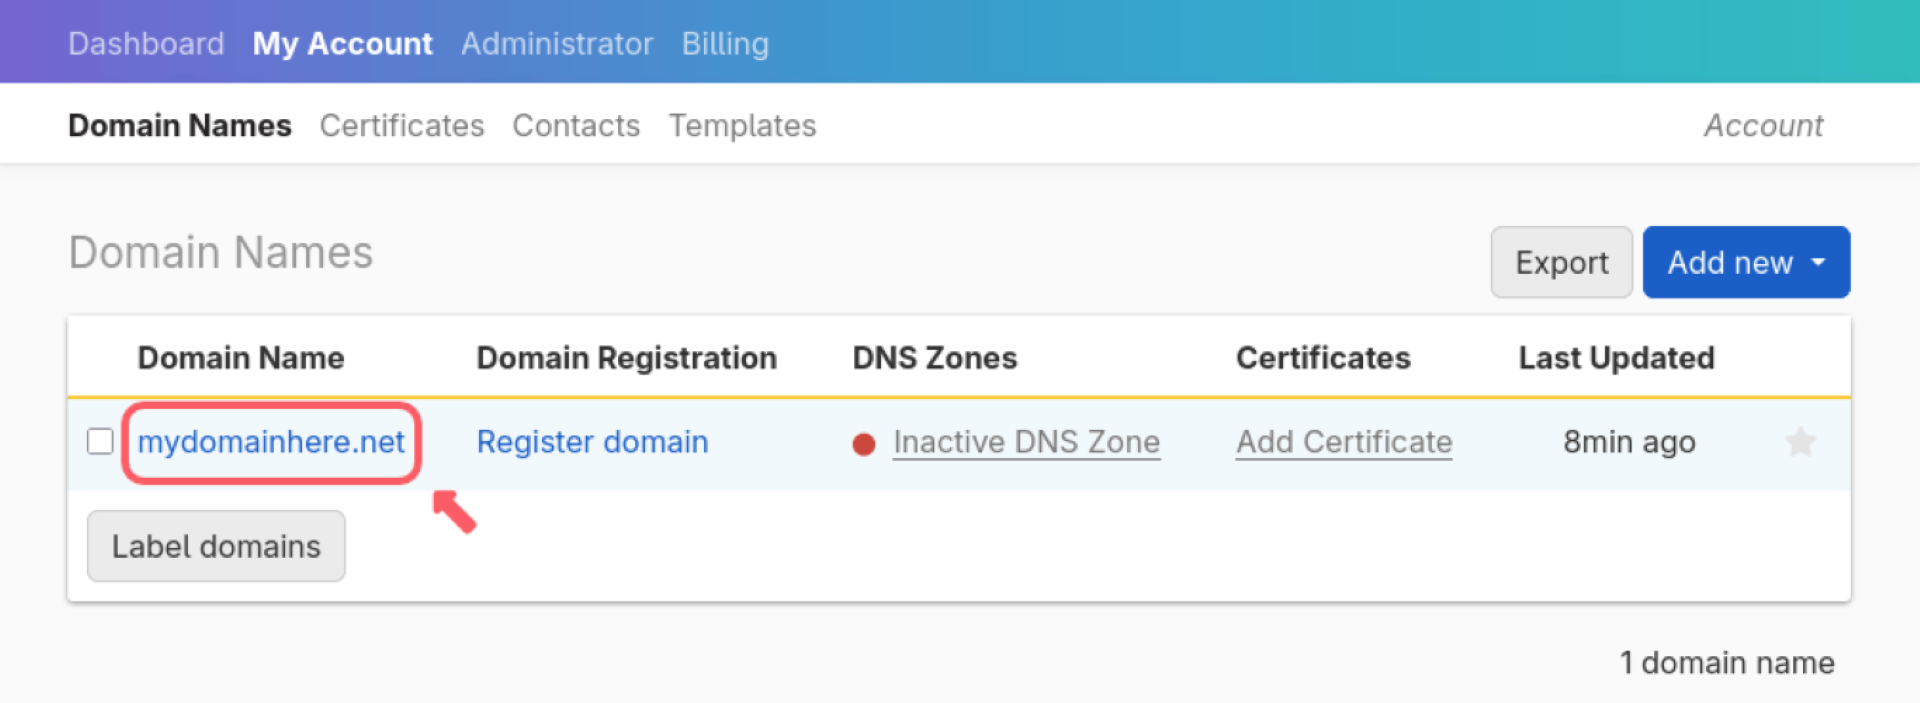
-
On the domain’s management page, click the DNS tab on the left side, then find the DNS records card on the right. Click Add to navigate to the Record Editor.

[!NOTE]
The domain’s DNS zone must be active for it to resolve. -
In the Record Editor, click Add record, then choose an A record from the list of record types. This will bring you to a page where you will fill out the fields of the record type you select.
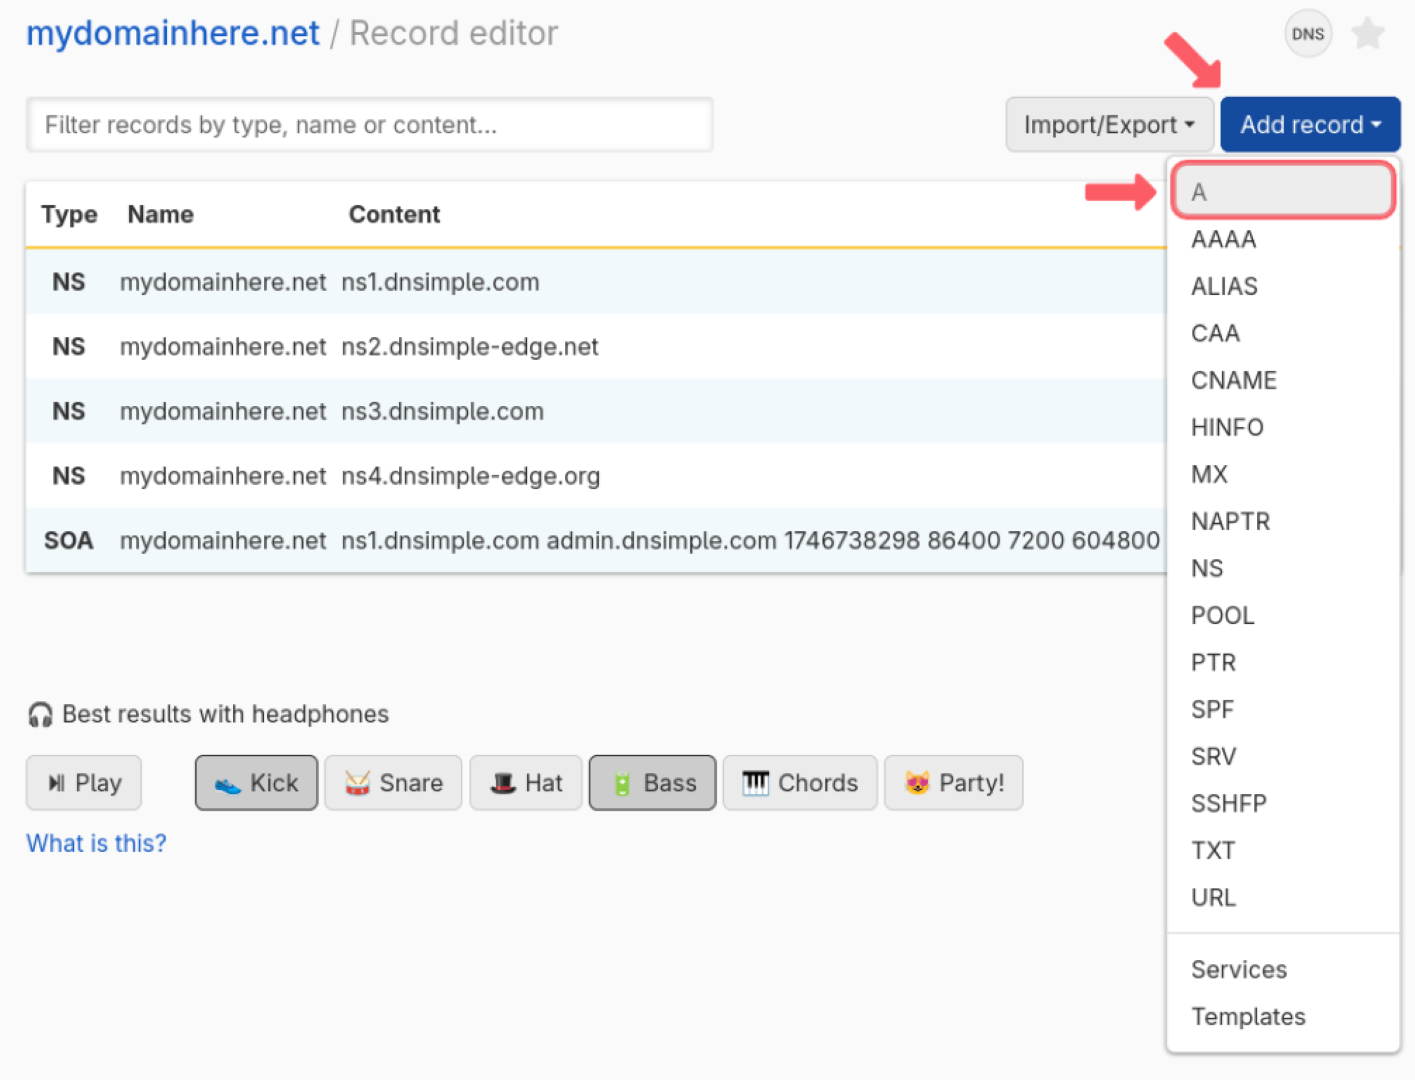
[!TIP]
An A Record maps your domain to the IPv4 address of your endpoint. It is required to resolve your domain to your site. Learn more about A Records. -
Fill out the fields for your record type. When you are finished, click Add Record.
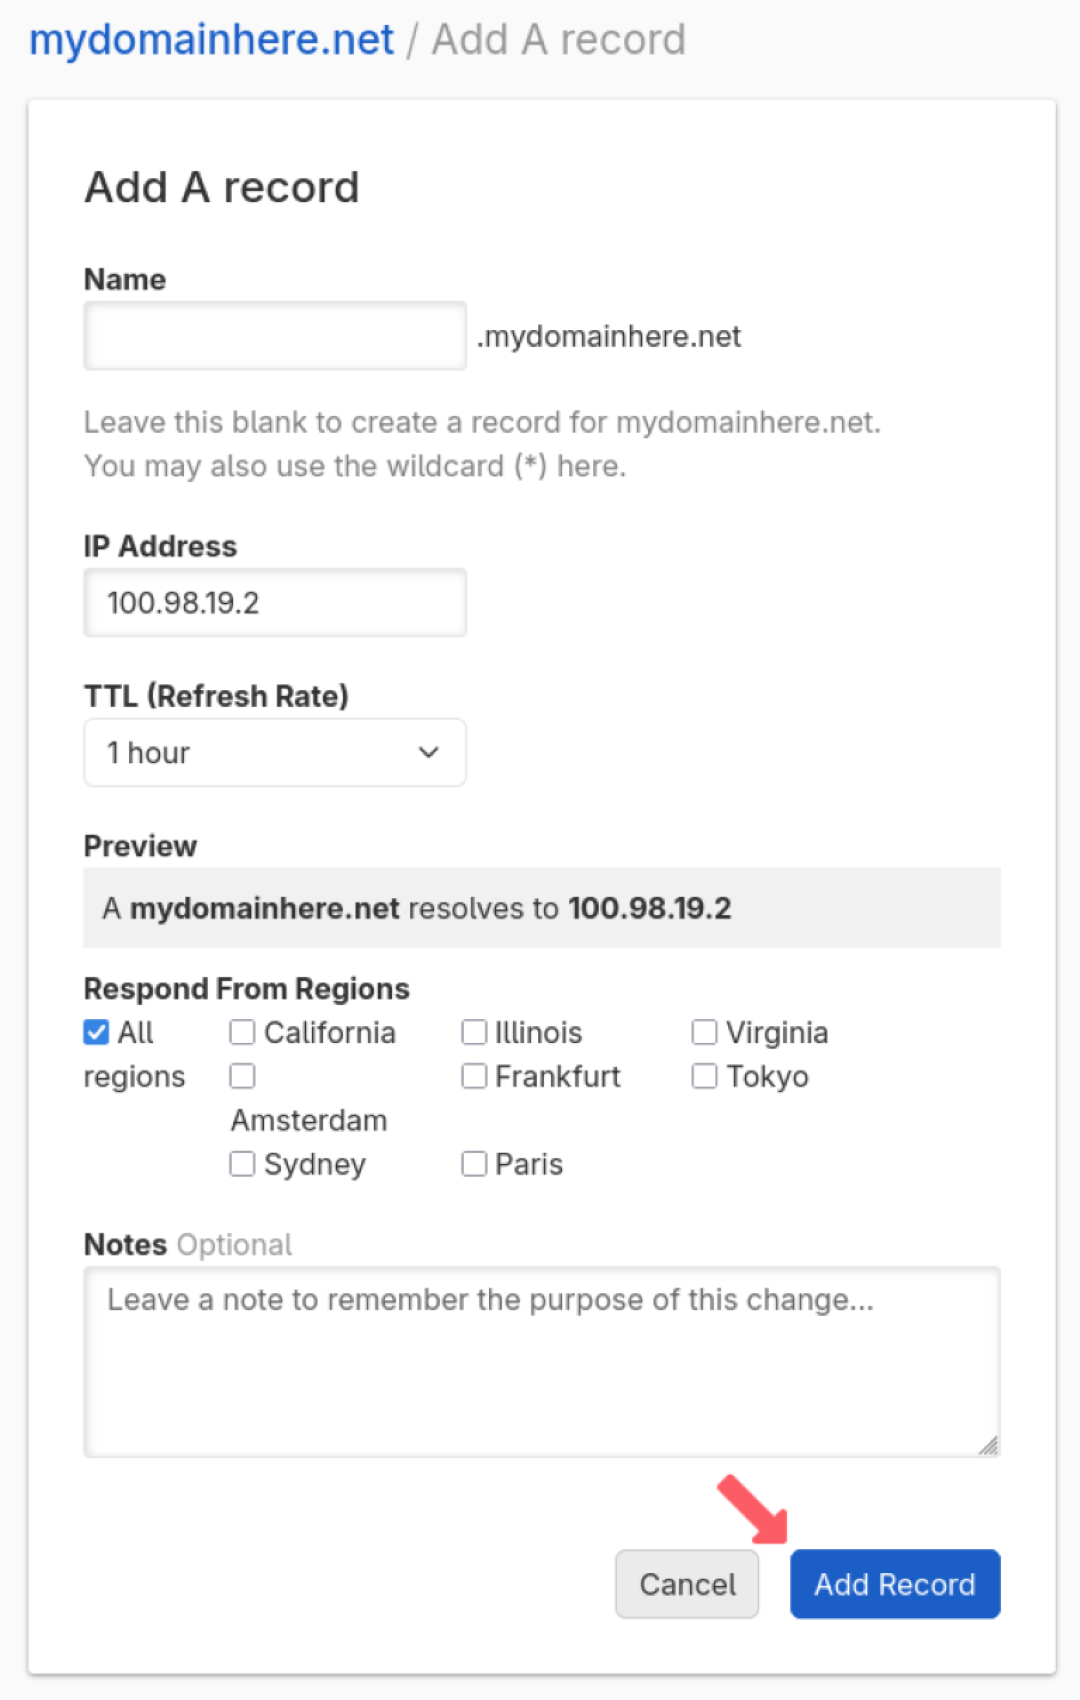
You have successfully added DNS to your domain through DNSimple.
You can continue to add more records based on your needs. If you aren’t sure what that looks like, try seeing which common DNS records are on many domains for inspiration.
Adding DNS to an external domain
If you don’t have your domain in your DNSimple account, follow these steps to add a DNS zone for a domain you already have through another domain registrar.
-
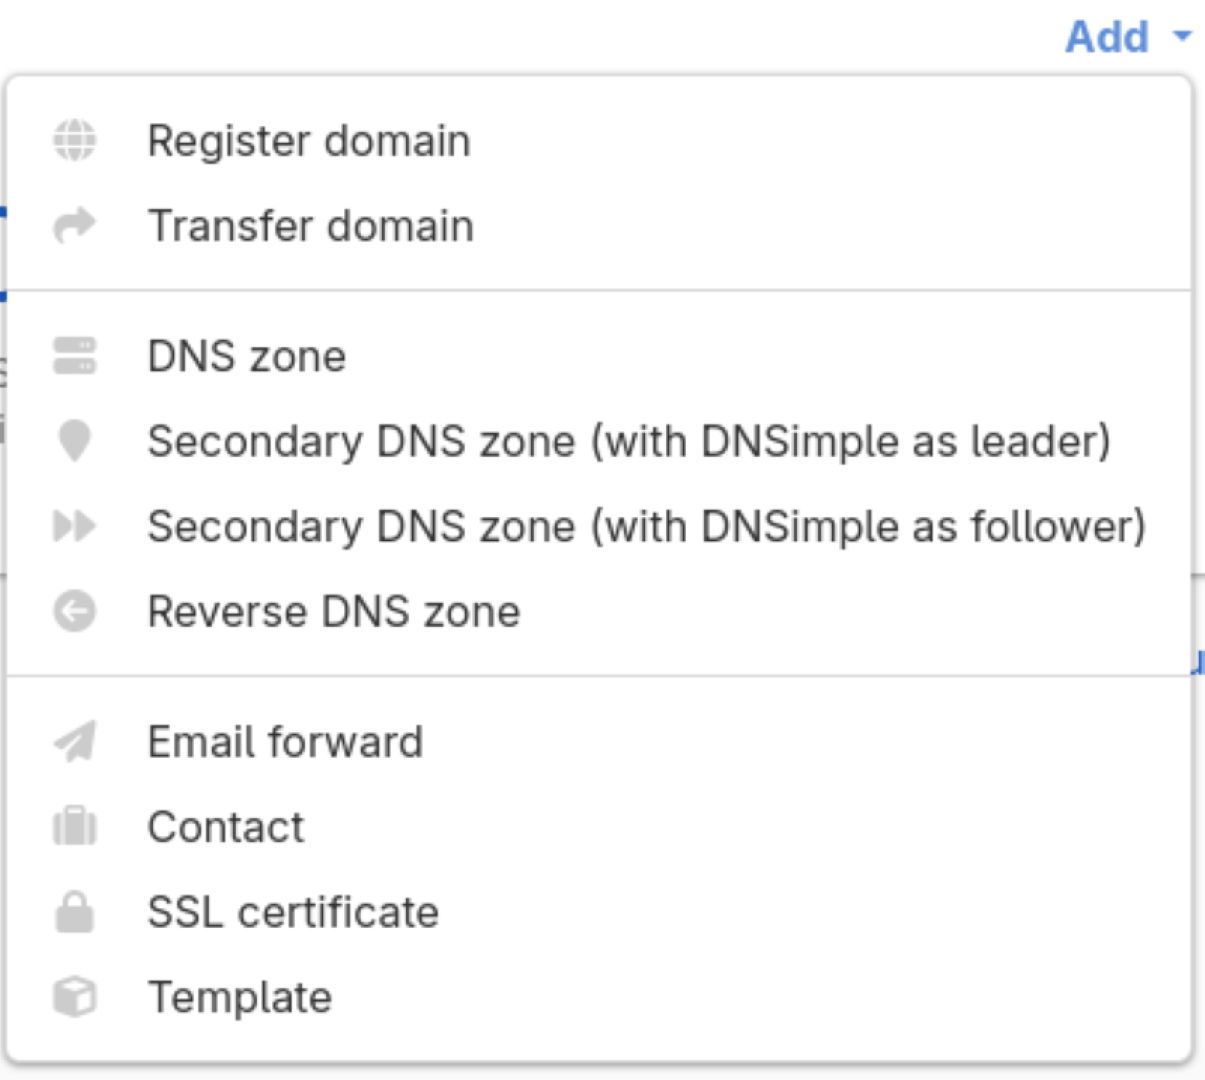
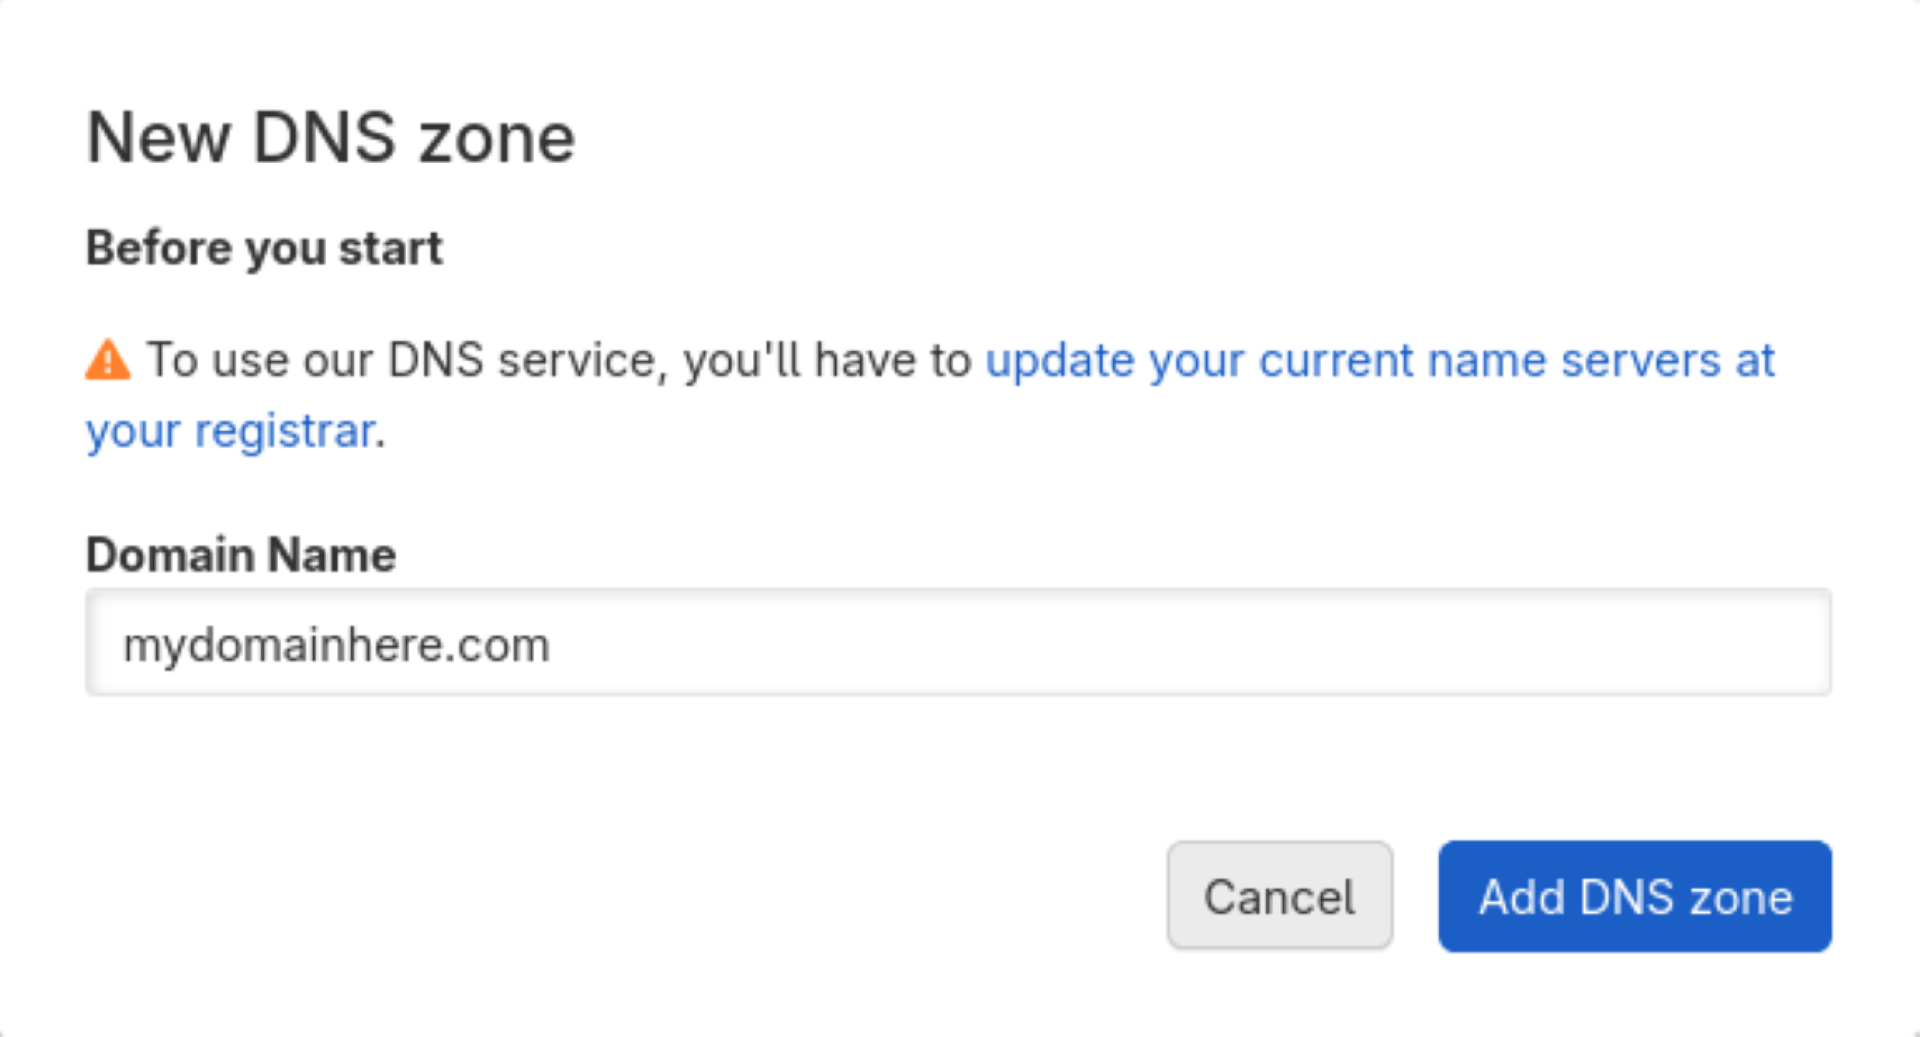
Navigate to the DNSimple Dashboard, then click Add, and select DNS zone from the list of options.
-
Enter the domain name that you want to set up a DNS zone for. If your domain is under a different registrar, you will need to add DNSimple name servers at your registrar.
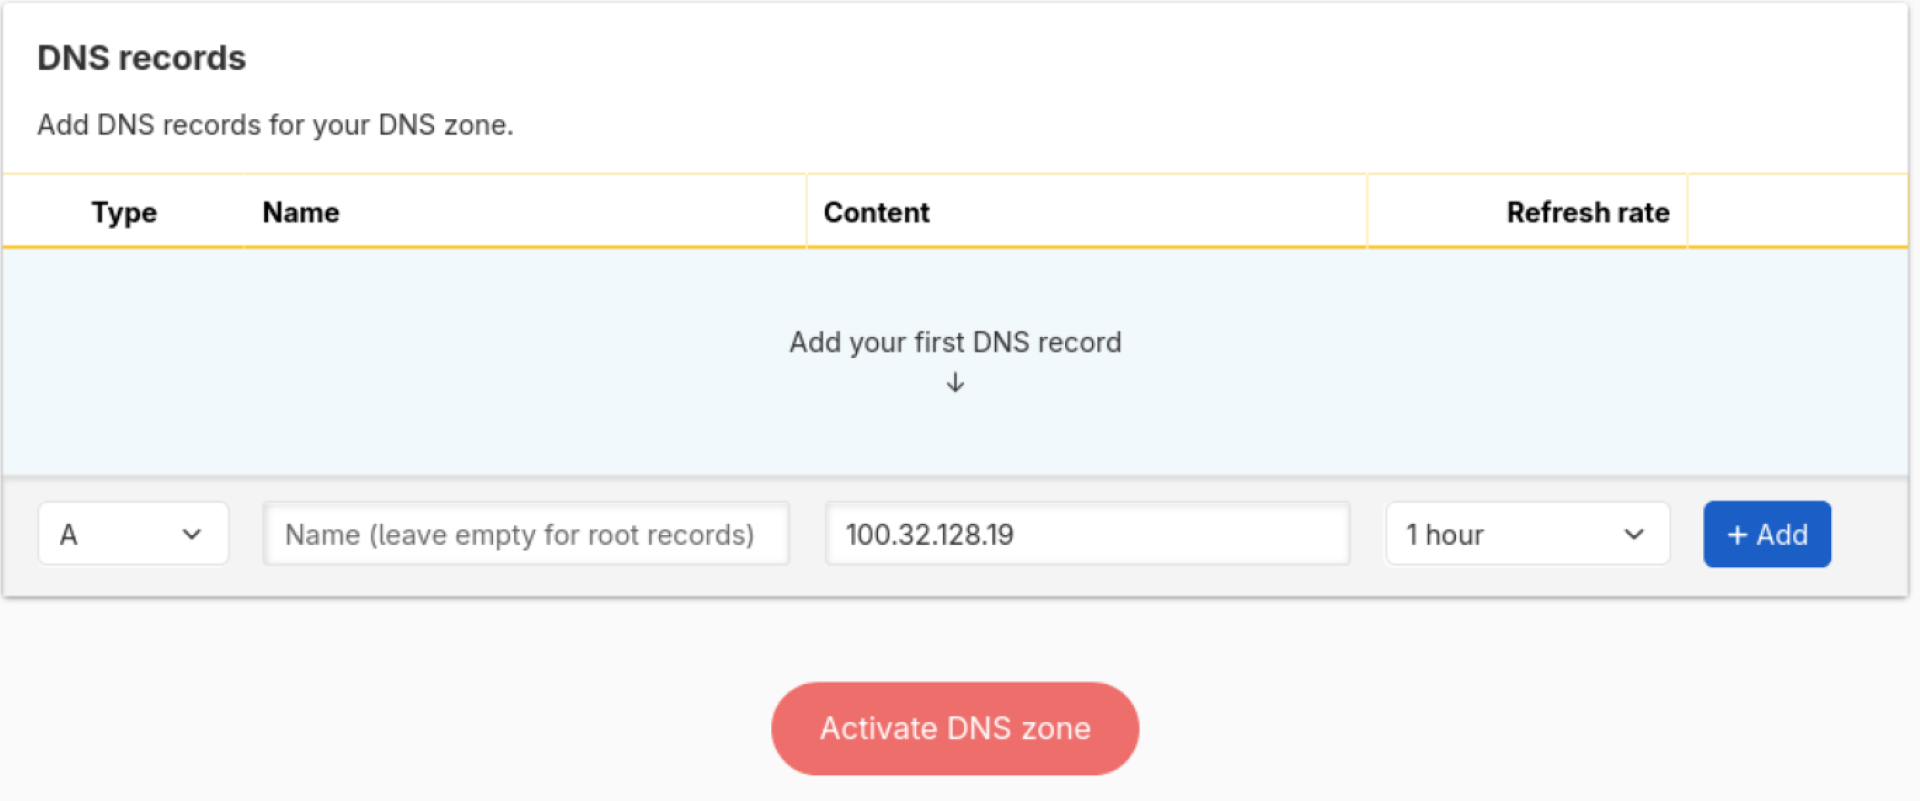
-
On the next page, you can import DNS from another provider, connect to a service, use our One-click Services, or enter DNS records manually. Try adding an A record for the root domain by leaving the name field blank and adding in the IPv4 address of your host.
[!TIP]
If you need more examples of records to add, try looking at Common DNS Records. -
Once you are ready, click Activate DNS zone, then confirm the activation of your DNS zone on the next page.
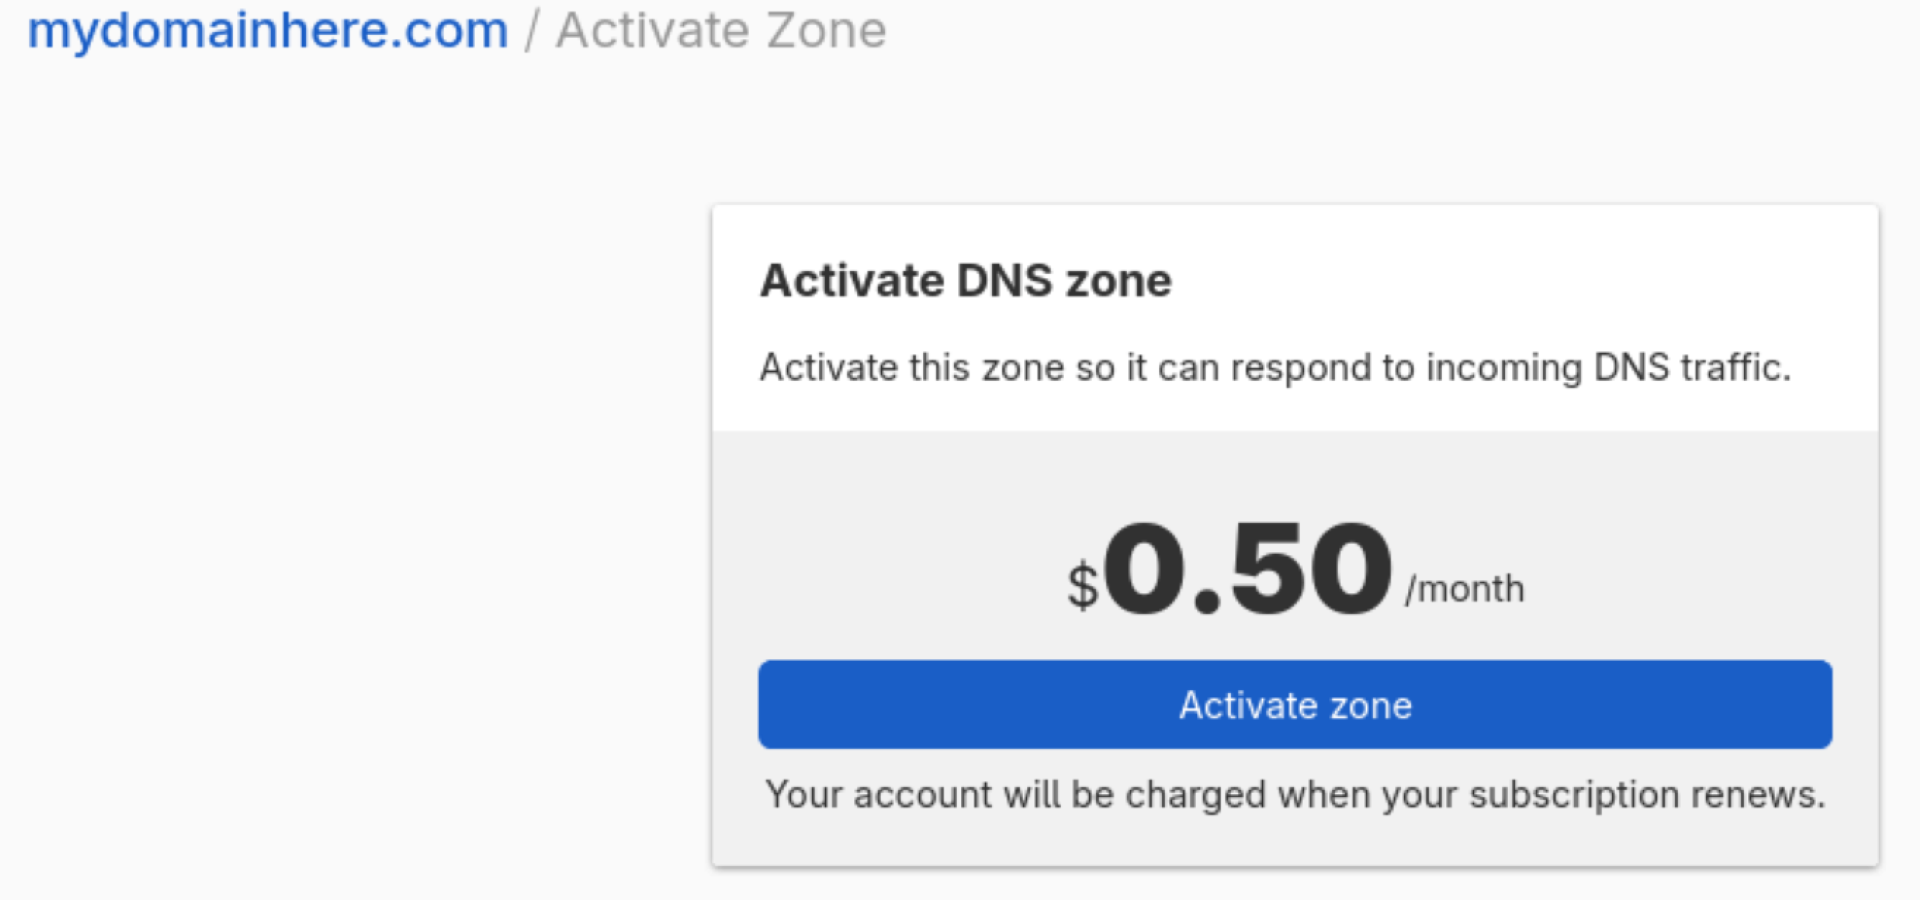
You just added a DNS zone for your domain.
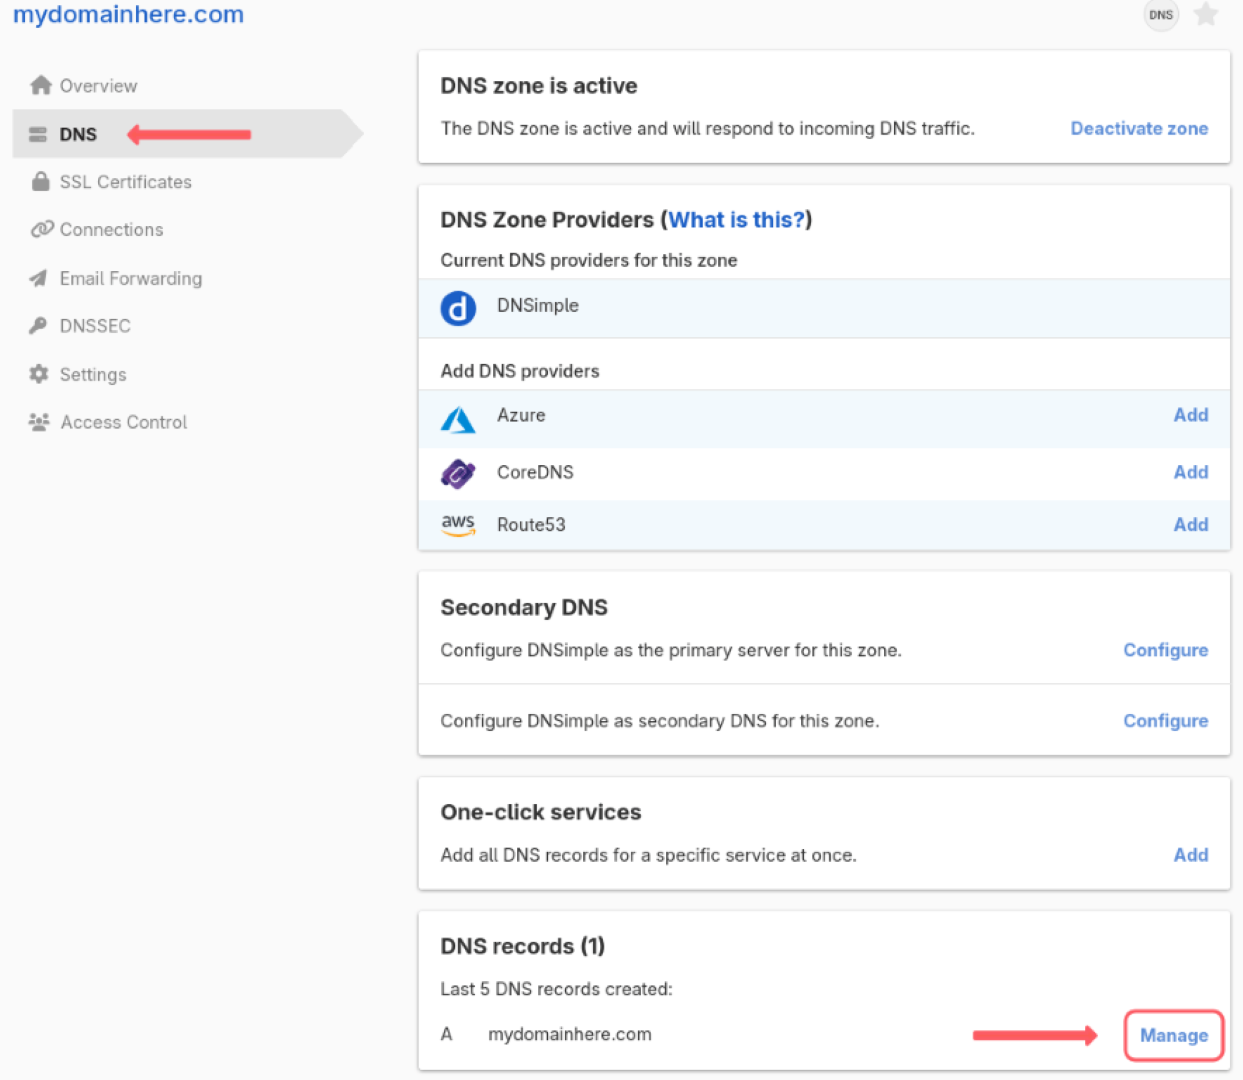
Tip
If you want to change or edit your DNS, navigate to the DNS tab under your domain’s management page.
What’s next?
Now that you have completed some tasks in DNSimple, what’s next? You can automate domain management or get analytics with our API. If you want to protect your site in the case of DNS servers going offline, try setting up Secondary DNS. To add secure connections between your domain and a client, learn how an SSL Certificate makes that happen. Check out our DNSimple Services page for a full overview of everything we offer. Check out our comics to see how DNS and the surrounding technologies work.
Have more questions?
If you have any questions or need assistance getting started with your DNSimple account, contact support, and we’ll be happy to help.