Adding Dyn as a Secondary DNS Server
For an overview of secondary DNS, see Add a secondary DNS server to DNSimple.
Table of Contents
Requirements
- An active account with Dyn. Your secondary DNS setup will vary depending on whether you use Dyn Standard or Dyn Managed DNS.
- Your domain is pointing to the DNSimple name servers.
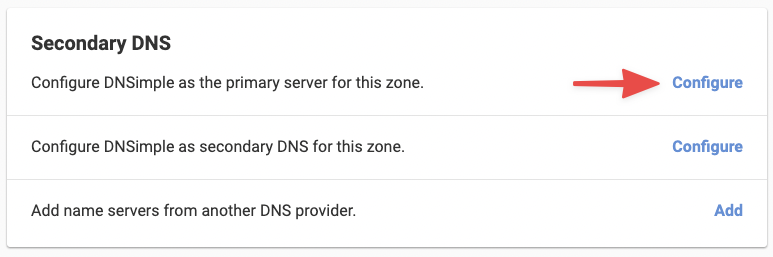
You can get started with secondary DNS from the tab on the domain page.
Setting up for Dyn Standard
First, set up secondary DNS at Dyn. Look for the Standard DNS secondary zone instructions on the Dyn help site.
During setup, use the following address as the primary server to perform AXFR transfers:
- Name: axfr.dnsimple.com
- IP: 18.189.127.127
When you set up your secondary DNS configuration in Dyn, they will provide you with a list of name server names in the format nsx.mydyndns.org or nsxxxx.dns.dyn.com. Enter these names when you enable your secondary DNS with us.
We suggest waiting an hour or two before enabling your secondary DNS in DNSimple. This gives Dyn time to deploy the configuration for secondary DNS on our side.
From DNSimple, select Dyn Standard as the provider and click Enable at the bottom of the form. The IP addresses Dyn is expecting are already filled in for you. You will need to fill in the name servers using the name server names Dyn provided to you when you enabled secondary DNS on their side.
A confirmation message will tell you secondary DNS has been enabled from the DNSimple side.

Your secondary DNS should now be set up with Dyn Standard.
Setting up for Dyn Managed
First, set up secondary DNS at Dyn. Look for the Managed DNS secondary zone instructions on the Dyn help site.
During setup, use the following address as the primary server to perform AXFR transfers:
- Name: axfr.dnsimple.com
- IP: 18.189.127.127
When you set up your secondary DNS configuration in Dyn, they will provide you with a list of name server names in the format nsx.mydyndns.org or nsxxxx.dns.dyn.com. Enter these names when you enable your secondary DNS with us.
You may also want to wait an hour or two before enabling your secondary DNS in DNSimple. This gives Dyn time to deploy the configuration for secondary DNS on our side.
From DNSimple, select Dyn Managed as the provider and click Enable at the bottom of the form. The IP addresses Dyn is expecting are already filled in for you. You will need to fill in the name servers using the name server names Dyn provided to you when you enabled secondary DNS on their side.
A confirmation message will tell you secondary DNS has been enabled from the DNSimple side.
Your secondary DNS should now be set up with Dyn Managed.
If the zone at Dyn does not update after you change records at DNSimple, see Troubleshoot Secondary DNS Zone Transfers.
Have more questions?
If you have any questions about adding Dyn as a secondary DNS server, contact support, and we’ll be happy to help.