Manage CNAME Records
Table of Contents
You can manage CNAME records in DNSimple using the DNS record editor.
The instructions in this article assume you are familiar with the CNAME record format and usage.
Adding a CNAME record
To add a CNAME record
- Use the account switcher at the top right corner of the page to select the appropriate account.
- From the Domain Names list, click the domain you want to manage.
- On the domain page, click Edit DNS at the top-right to open the Record Editor.
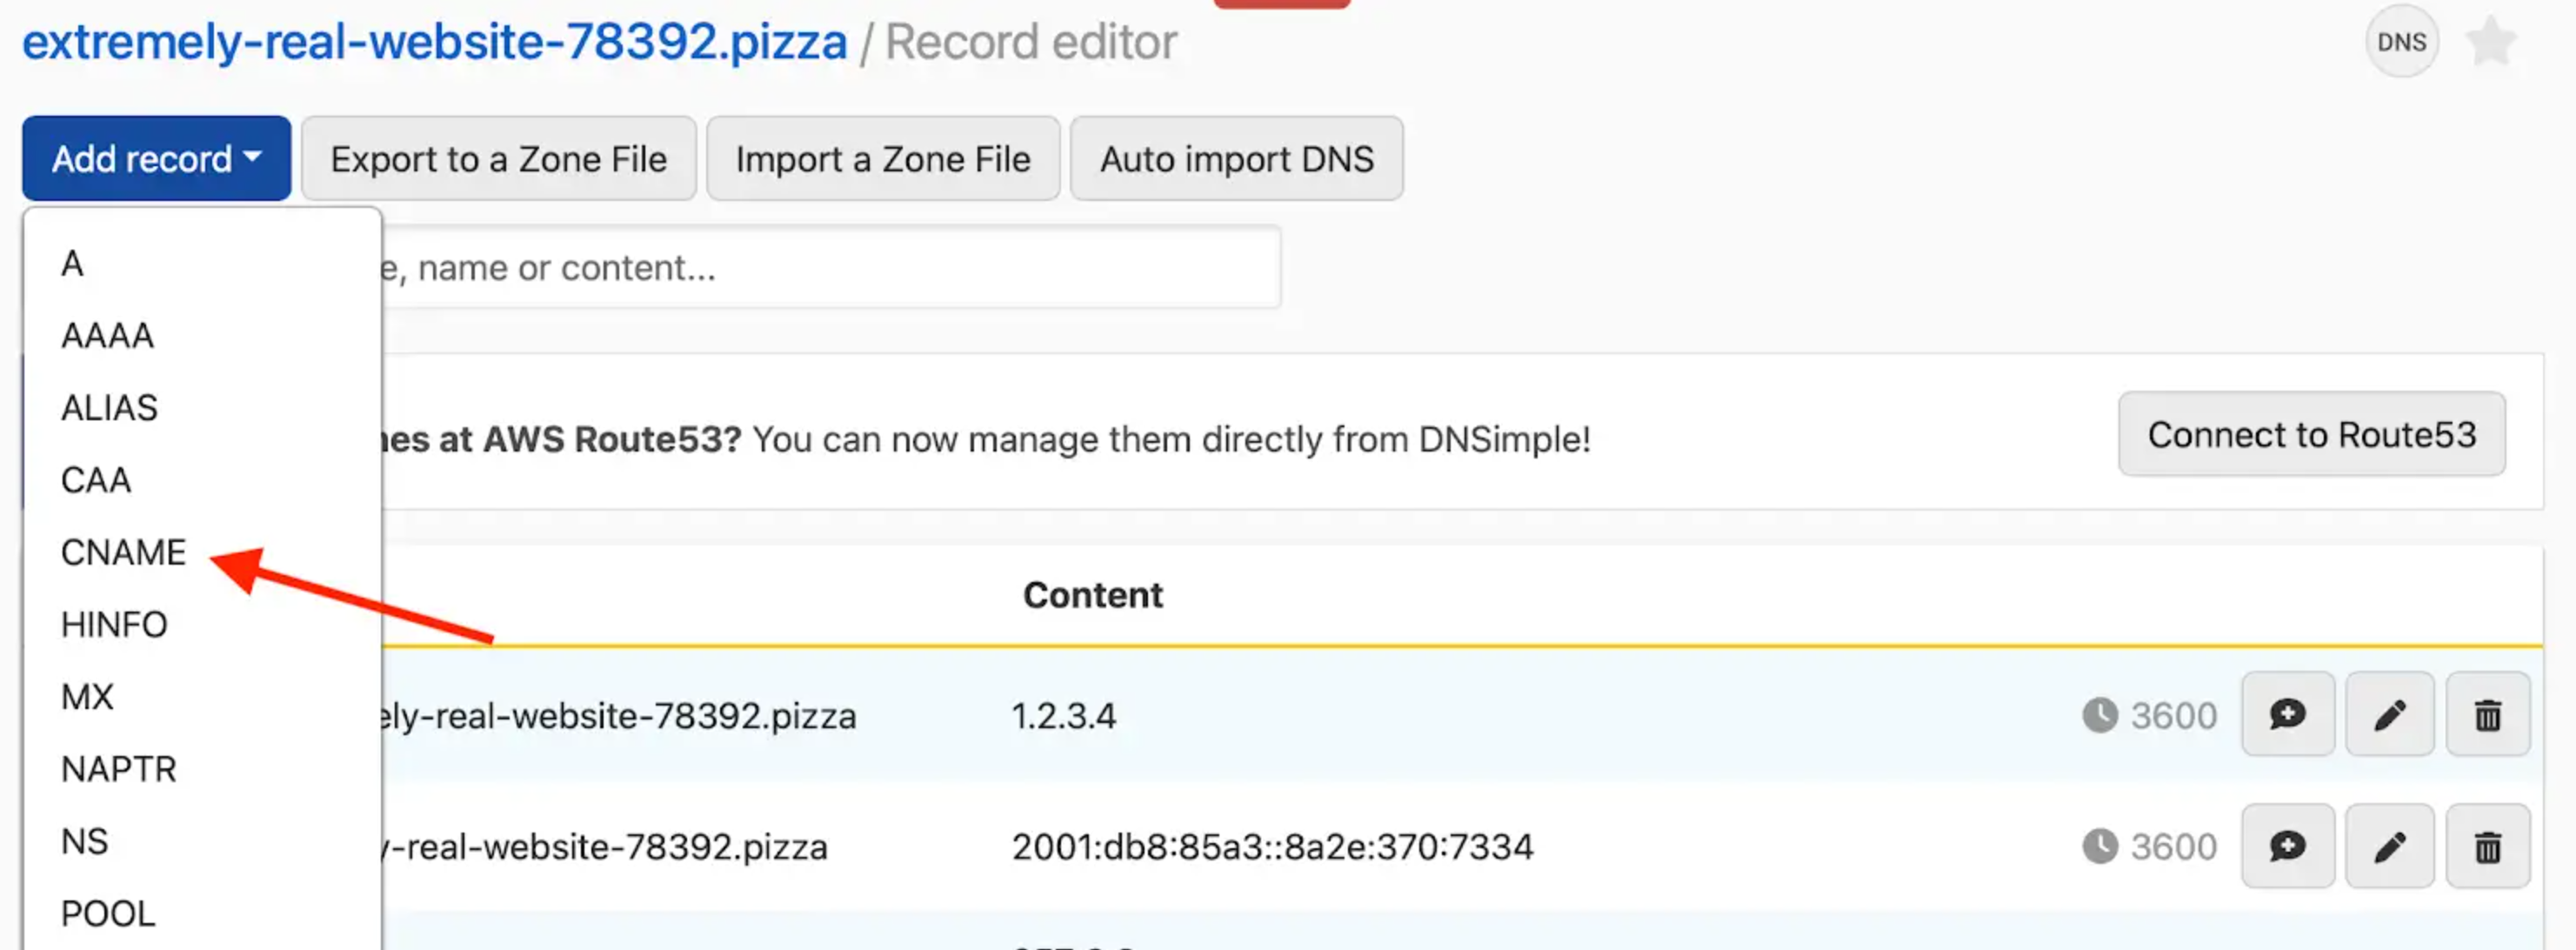
- In the Record Editor, click Add record, and select CNAME from the dropdown menu.
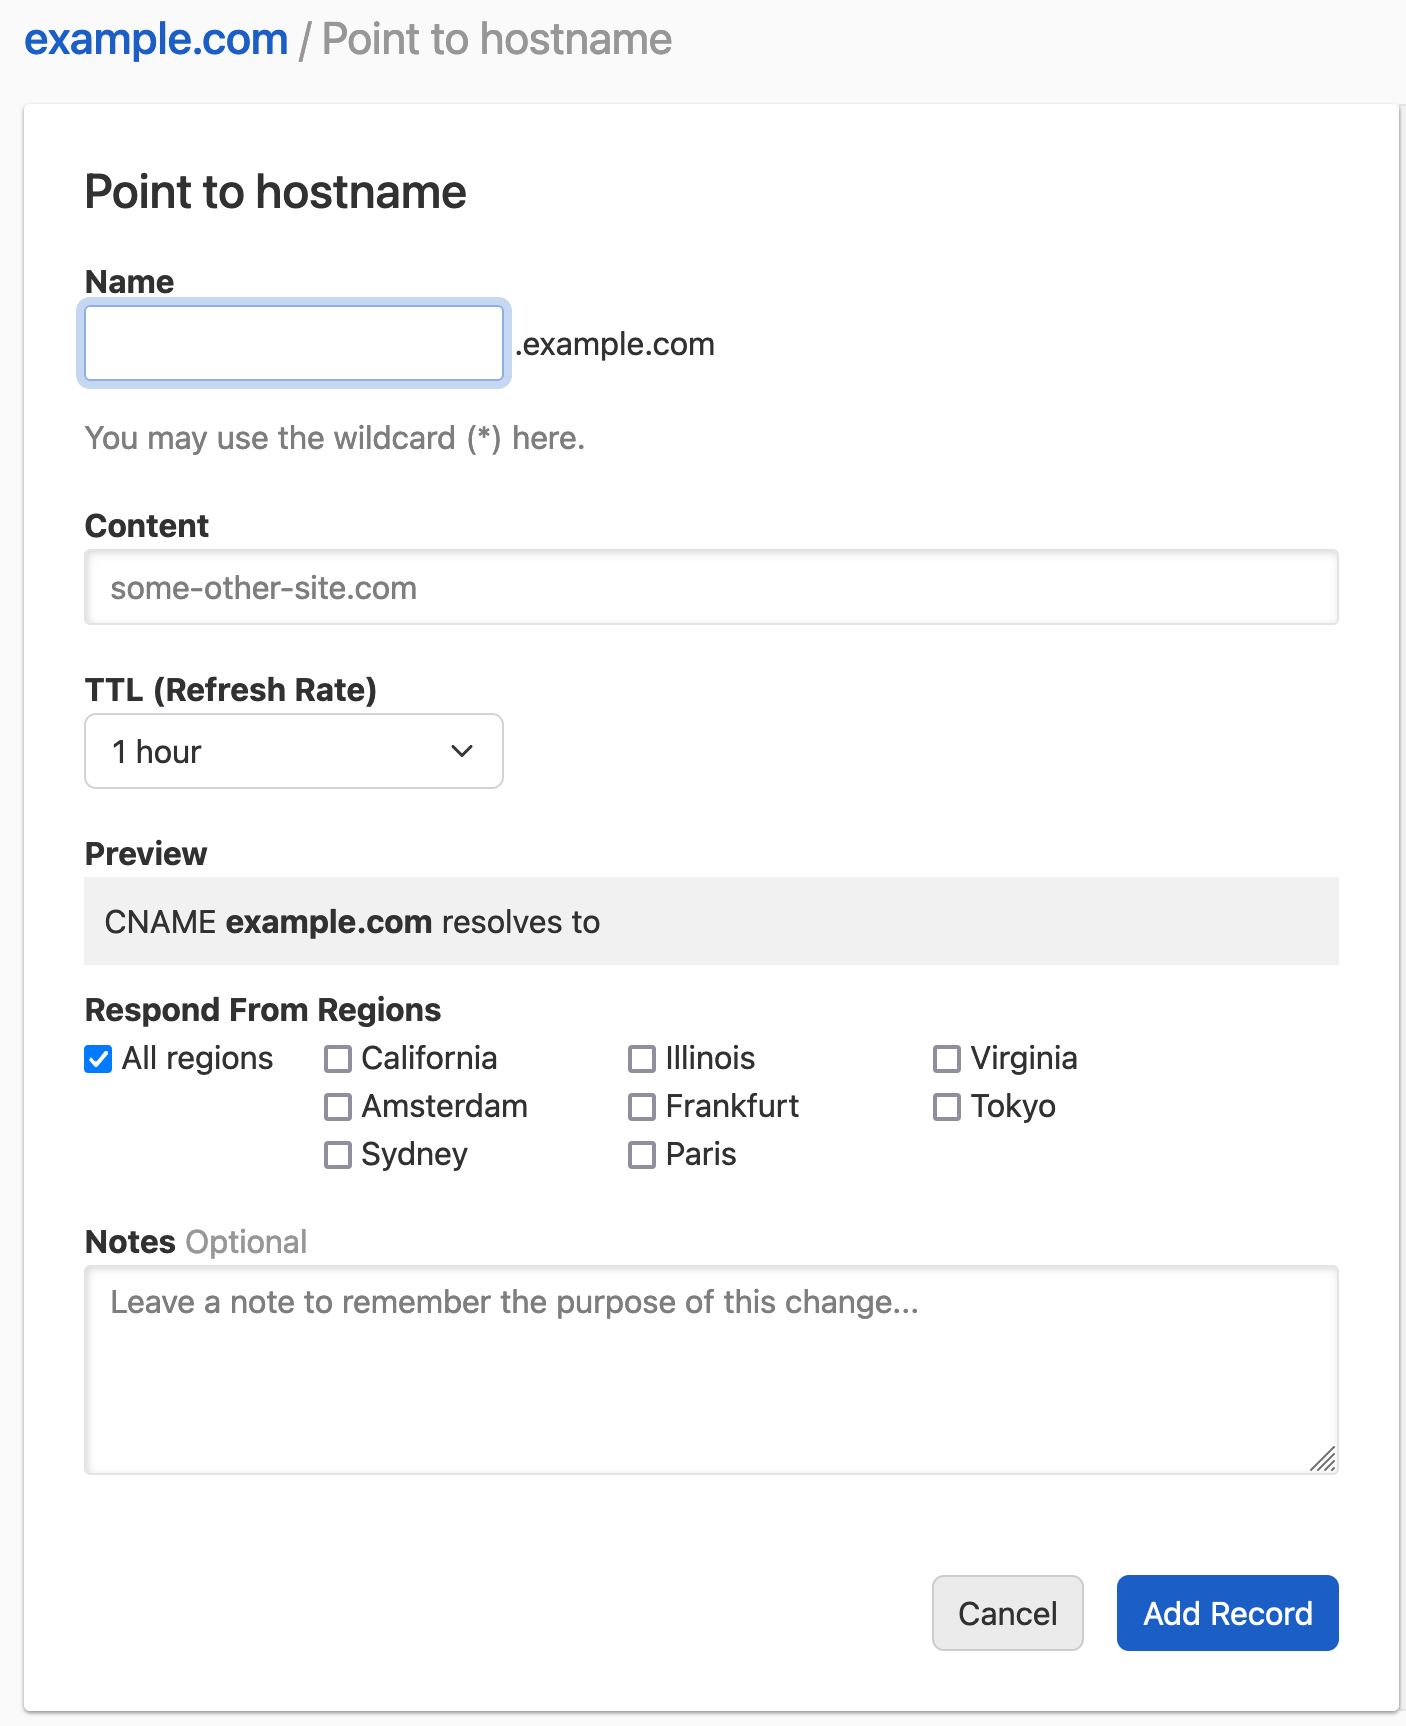
- Enter the CNAME record information.
-
Name: the subdomain you want to create the record for, without the domain name. For example, if you want to represent
www.example.comenterwww. This field cannot be left blank. -
Content: the target host name this host will point to. It must be a host name (e.g.,
blog.dnsimple.com) and not a URL (e.g.,http://blog.dnsimple.comorhttp://blog.dnsimple.com/postare invalid).
As with any other DNS record, you can configure:
- TTL: the record time-to-live.
- Respond From Regions: Configure Regional Records if desired.
- Notes: Optionally include a record note.
Note
Some hosting providers label fields differently than DNSimple does, which can be confusing if you are copying DNS settings from another provider.
- In DNSimple, Name = what others might call Host.
- In DNSimple, Content = what others might call Value.
-
Click Add Record to confirm and create the record.
-
The record is created and visible in the record list.

Attempting to add a new record where a CNAME exists
You cannot add another record type on a subdomain where a CNAME record already exists.
A CNAME points the entire subdomain to another hostname, so it overrides any other records on that subdomain. Because of this, the DNS system blocks you from adding a CNAME alongside other records.
Examples:
- If
email.example.comalready has an MX record, and you try to add a CNAME to that exact subdomain (email.example.com), the MX record would stop working. The CNAME would override the subdomain (email.example.com), rendering the MX record useless, which stops your email. To counter this potential error, the Domain Name System does not allow other records alongside a CNAME. - You also cannot add a CNAME at the root domain (like
example.com). The root already requires other records (e.g., NS and SOA). Trying to create a CNAME there will return an error:Another record already exists for example.com, cannot add a CNAME.You can achieve a similar behavior to CNAME records with an ALIAS record. If you want a sub-domain to always resolve to the IP address of another domain, you can use an ALIAS record pointing to that domain. You should only do this if absolutely necessary, as the ALIAS record has a small amount of additional overhead compared to A and CNAME records.
Updating a CNAME record
To update a CNAME record
- Use the account switcher at the top right corner of the page to select the appropriate account.
- From the Domain Names list, click the domain you want to manage.
- On the domain page, click Edit DNS at the top-right to open the Record Editor.
- Locate the CNAME record you want to update in the list.
-
Click the edit icon (🖊️) at the end of the record row to edit it.

- Update the information, and click Update Record to save the record.
Removing a CNAME record
To remove a CNAME record
- Use the account switcher at the top right corner of the page to select the appropriate account.
- From the Domain Names list, click the domain you want to manage.
- On the domain page, click Edit DNS at the top-right to open the Record Editor.
- Locate the CNAME record you want to remove in the list
-
Click the trash icon at the end of the row to delete it.

- Confirm the dialog to delete the record.
Have more questions?
If you have more questions or need assistance setting up CNAME records, just contact our support team, and we will be happy to help.