Google Workspace Service
Last updated
Table of Contents
- Before you start
- Add the Google Workspace service
- Add the MX record yourself
- Verify your domain with Google
- Check the MX record
- Set up email authentication
- Troubleshooting
- Have more questions?
Google Workspace provides email with Gmail, plus calendars, Drive, and other productivity tools. The Google Workspace one-click service adds one MX record for the domain apex, pointing to smtp.google.com with priority 1. That is the MX record Google gives for new setups. Domain verification, SPF, DKIM, and DMARC records are not part of the service; add them yourself as described below.
Before you start
You need a Google Workspace account with the domain added.
Warning
If the domain uses DNSimple email forwarding, turn it off before you set up Google Workspace. Email forwarding and email hosting both rely on MX records, so you can use only one of them.
Add the Google Workspace service
To add the Google Workspace service
- From the domain list, click the domain name.
- Click the tab on the left side.
-
In the card, click , or if the domain already has a service.
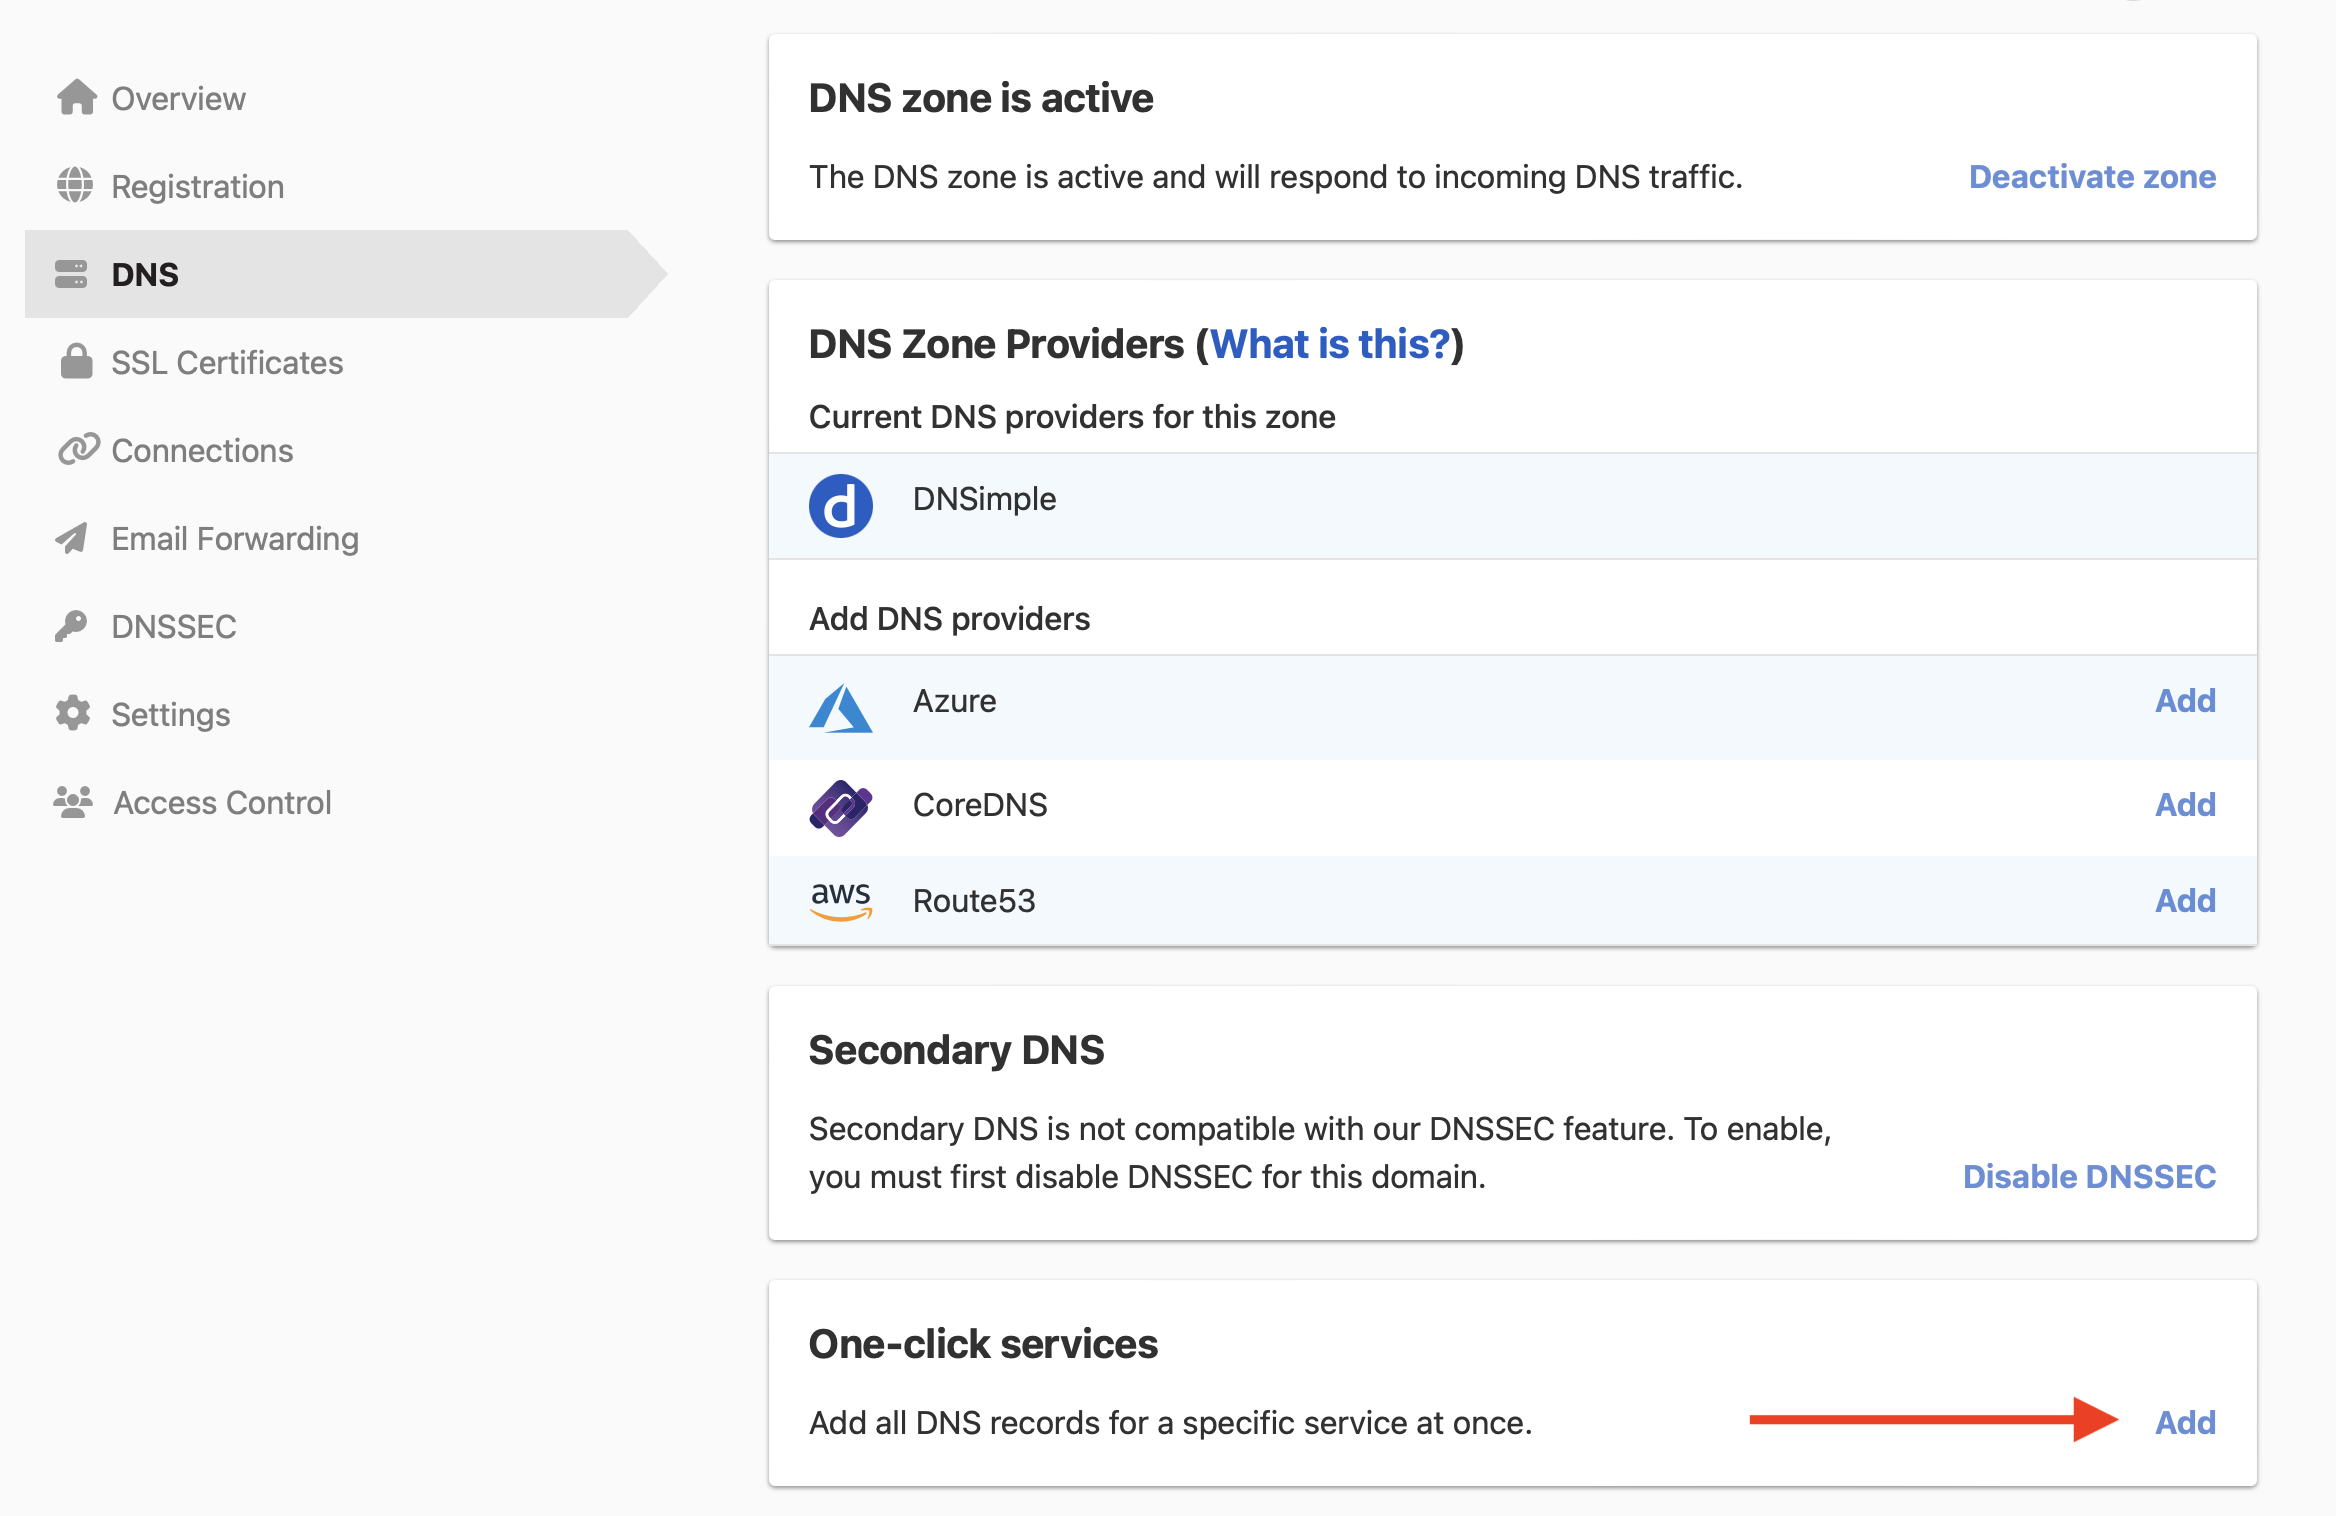
-
Click the tab, and click next to Google Workspace.
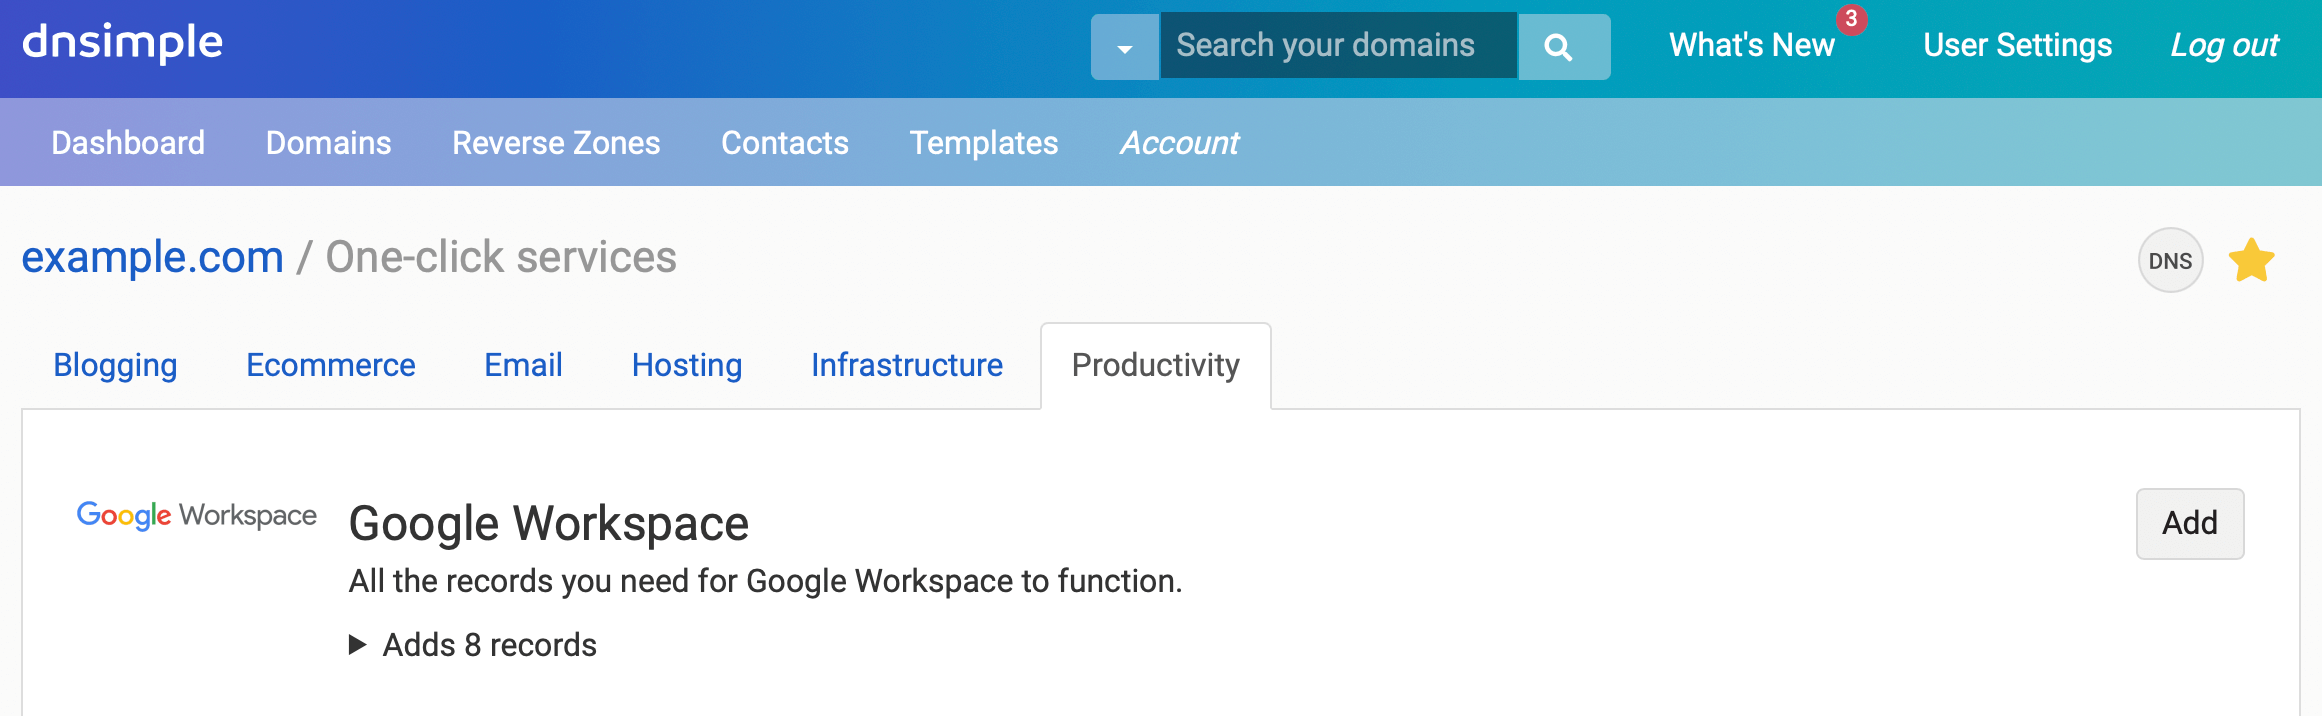
The service has no setup form, so DNSimple adds the record as soon as you click . Delete any MX records for other mail providers in the record editor, or mail can still go to them. To remove the service later, see Remove a one-click service.
Add the MX record yourself
To add the record without the service, open the record editor, click , select , leave blank, enter smtp.google.com with priority 1, and click .
If your domain already uses Google’s older MX records, the ones that start with aspmx, Google still supports them. If your email works, you do not need to change them.
Verify your domain with Google
Google Workspace asks you to verify that you own the domain, usually with a TXT record at the domain apex. Add the record in the record editor exactly as Google shows it during setup. After that, activate Gmail for the domain in the Google Admin console. See Google’s guide to setting up MX records for Google Workspace.
Check the MX record
Google’s Check MX tool checks your domain’s mail records and suggests fixes. You can also look up the MX record with dig:
dig +short example.com MX
Set up email authentication
For better deliverability, add SPF, DKIM, and DMARC records for the domain.
SPF: Your SPF record should include include:_spf.google.com. A domain can have only one SPF record, so if you already have one, add Google’s value to it. See What Is an SPF Record?
DKIM: Generate a DKIM key in the Google Admin console, then add the TXT record it shows in DNSimple. See Set Up DKIM.
DMARC: See Set Up DMARC.
Troubleshooting
Mail is not arriving: Look up the MX records with dig +short example.com MX. The answer should be only 1 smtp.google.com., or only Google’s older aspmx records. Remove MX records for any other provider, and make sure email forwarding is off. After a change, allow time for DNS caching to clear.
Domain verification fails: Check that the TXT record matches what Google shows, character for character. New records can take a few hours to be seen everywhere.
Messages fail SPF or DKIM: Check that there is only one SPF record and that it includes include:_spf.google.com, and that the DKIM record uses the name Google shows. See SPF records, Set Up DKIM, and Set Up DMARC.
Have more questions?
If you have additional questions or need any assistance setting up Google Workspace with DNSimple, contact support, and we’ll be happy to help. You can also read more about DNSimple integrations.