Okta as an Identity Provider
Table of Contents
- Prerequisites
- Supported Features
- Video walk-through
- Linking an Okta organization to a DNSimple account
- Linking a DNSimple user to an Okta identity
- Logging in via Okta
- Unlinking an Okta organization from a DNSimple account
- Unlinking a DNSimple user from an Okta identity
- Have more questions?
Using Okta as an identity provider for single sign-on streamlines the login experience for you and your team and helps you manage risk at scale. You can read more about the benefits of using Okta SSO for DNSimple in this post.
Prerequisites
To proceed with configuring login with SSO through Okta, you must:
- Have administrator access to an Okta organization. This is required for us to be able to react to team member changes in your Okta account (eg. only super admins can view and configure event hooks).
- Have administrator access to a DNSimple account.
- Be subscribed to a DNSimple plan that supports this feature. See our pricing page for additional details.
Supported Features
- SP-initiated Single Sign-On (SSO): Server-provider initiated. This authentication flow occurs when the user attempts to log in to DNSimple from Okta.
- Import Users: Manage who can access your DNSimple account by assigning users to the Okta application
Video walk-through
Linking an Okta organization to a DNSimple account
You can also follow the instructions in Okta’s documentation to connect DNSimple to your Okta organization.
Adding the DNSimple app to Okta
Note
These steps are performed in your Okta account.
- Log in to your organization’s Okta dashboard as an administrator.
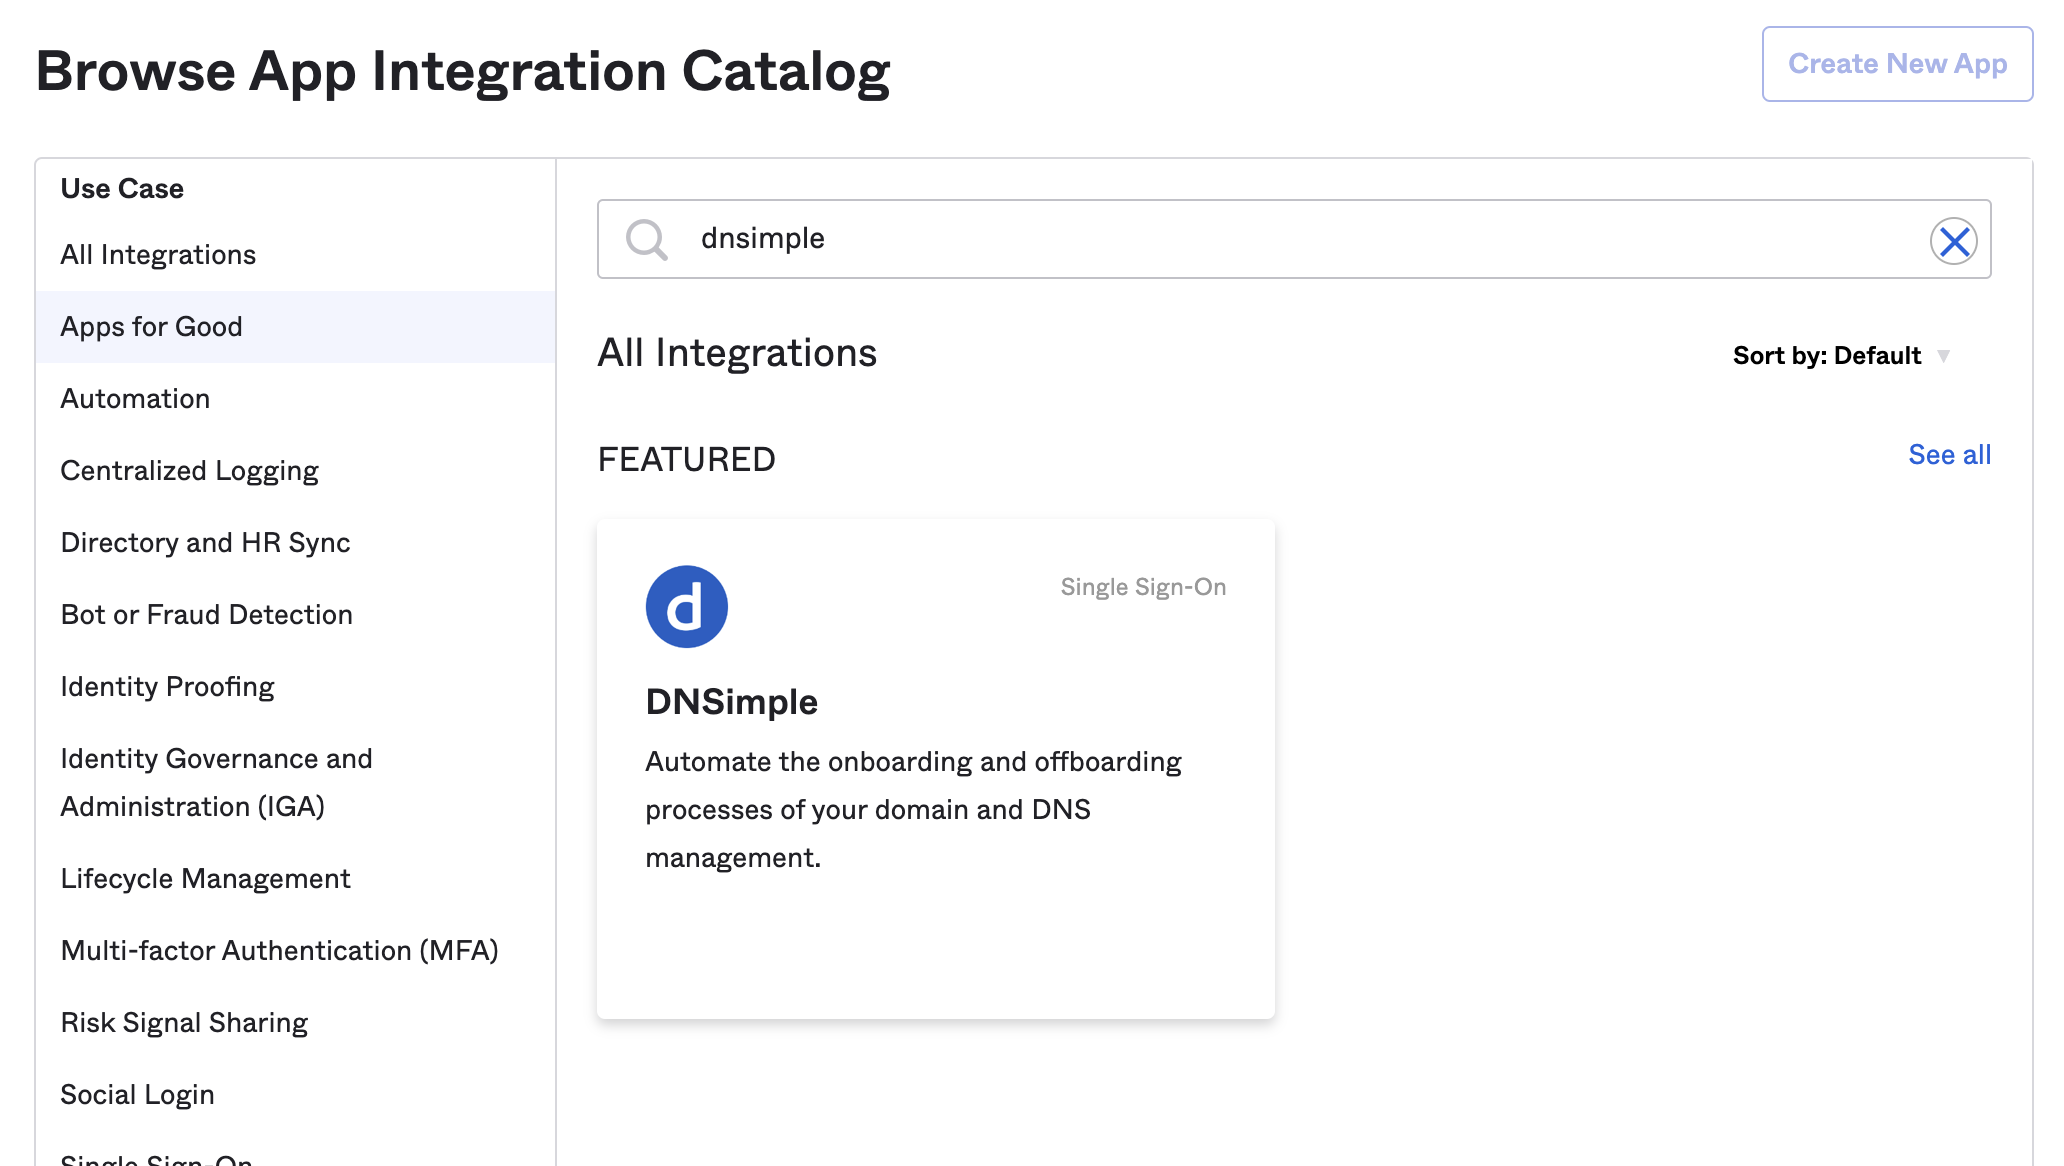
- Go to the Applicationspage, then click Browse App Catalog.
- Search for DNSimple and click Add Integration.
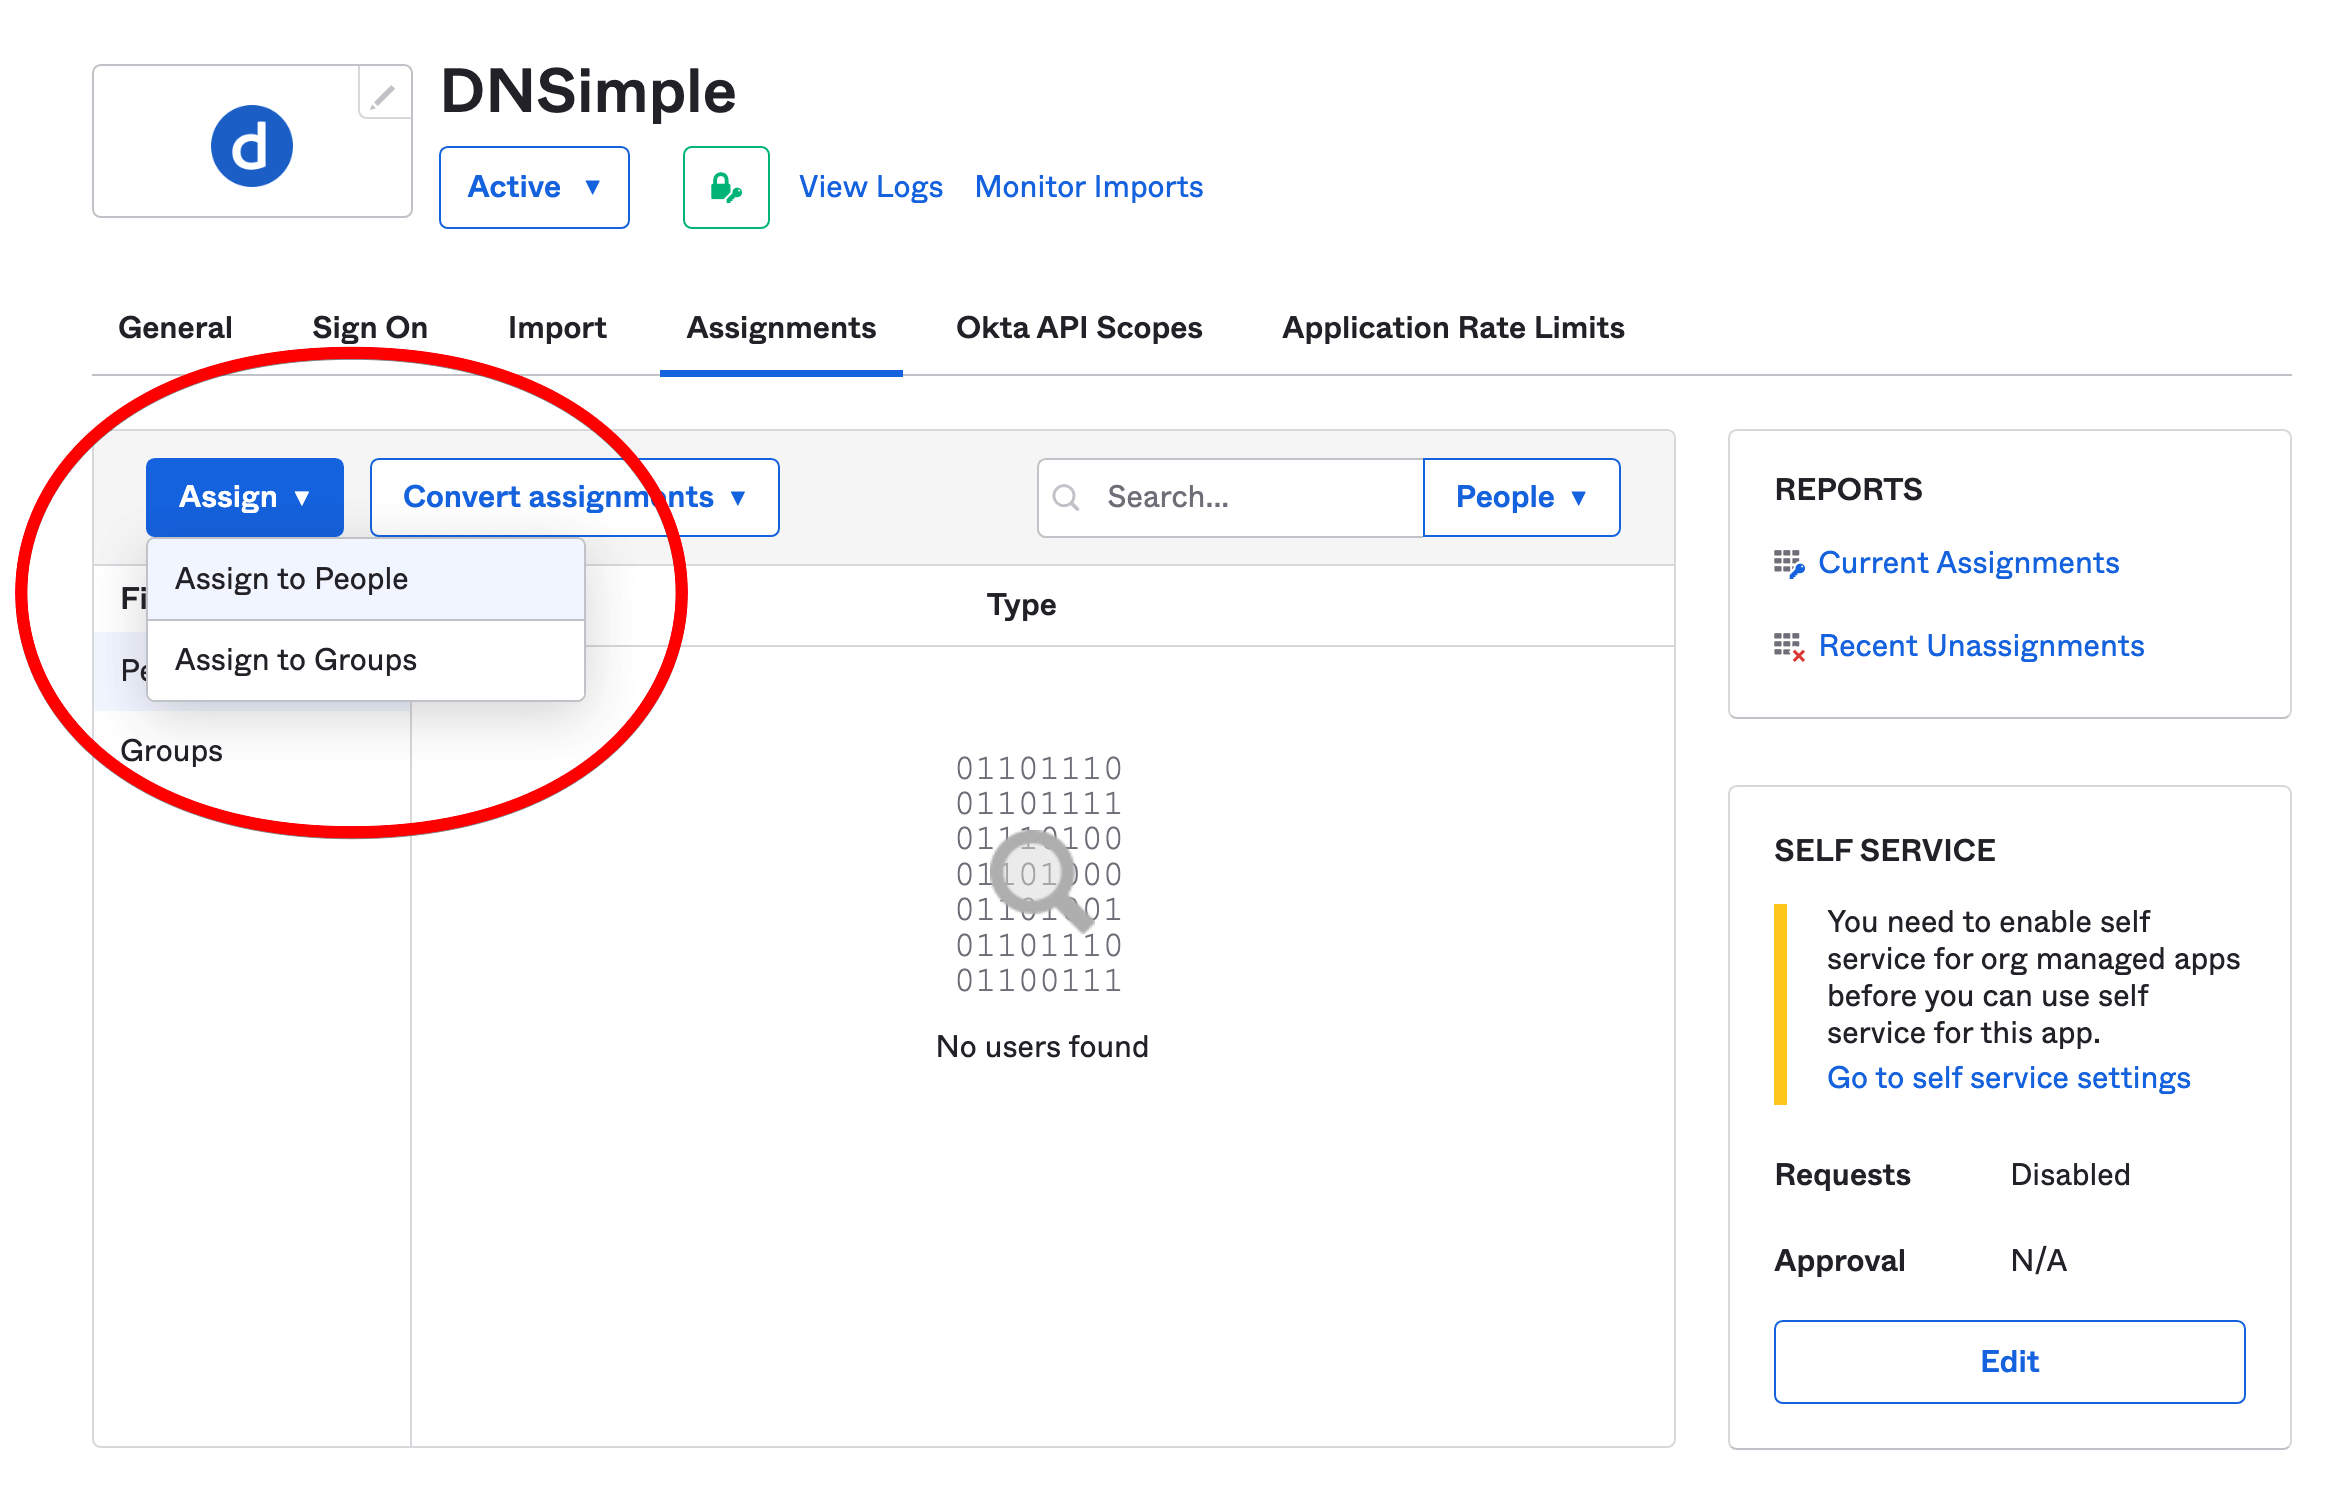
- Click the Assignments tab to give users and groups from your Okta directory permission to sign in to DNSimple via Okta as an identity provider. Read more about assignments in Okta .
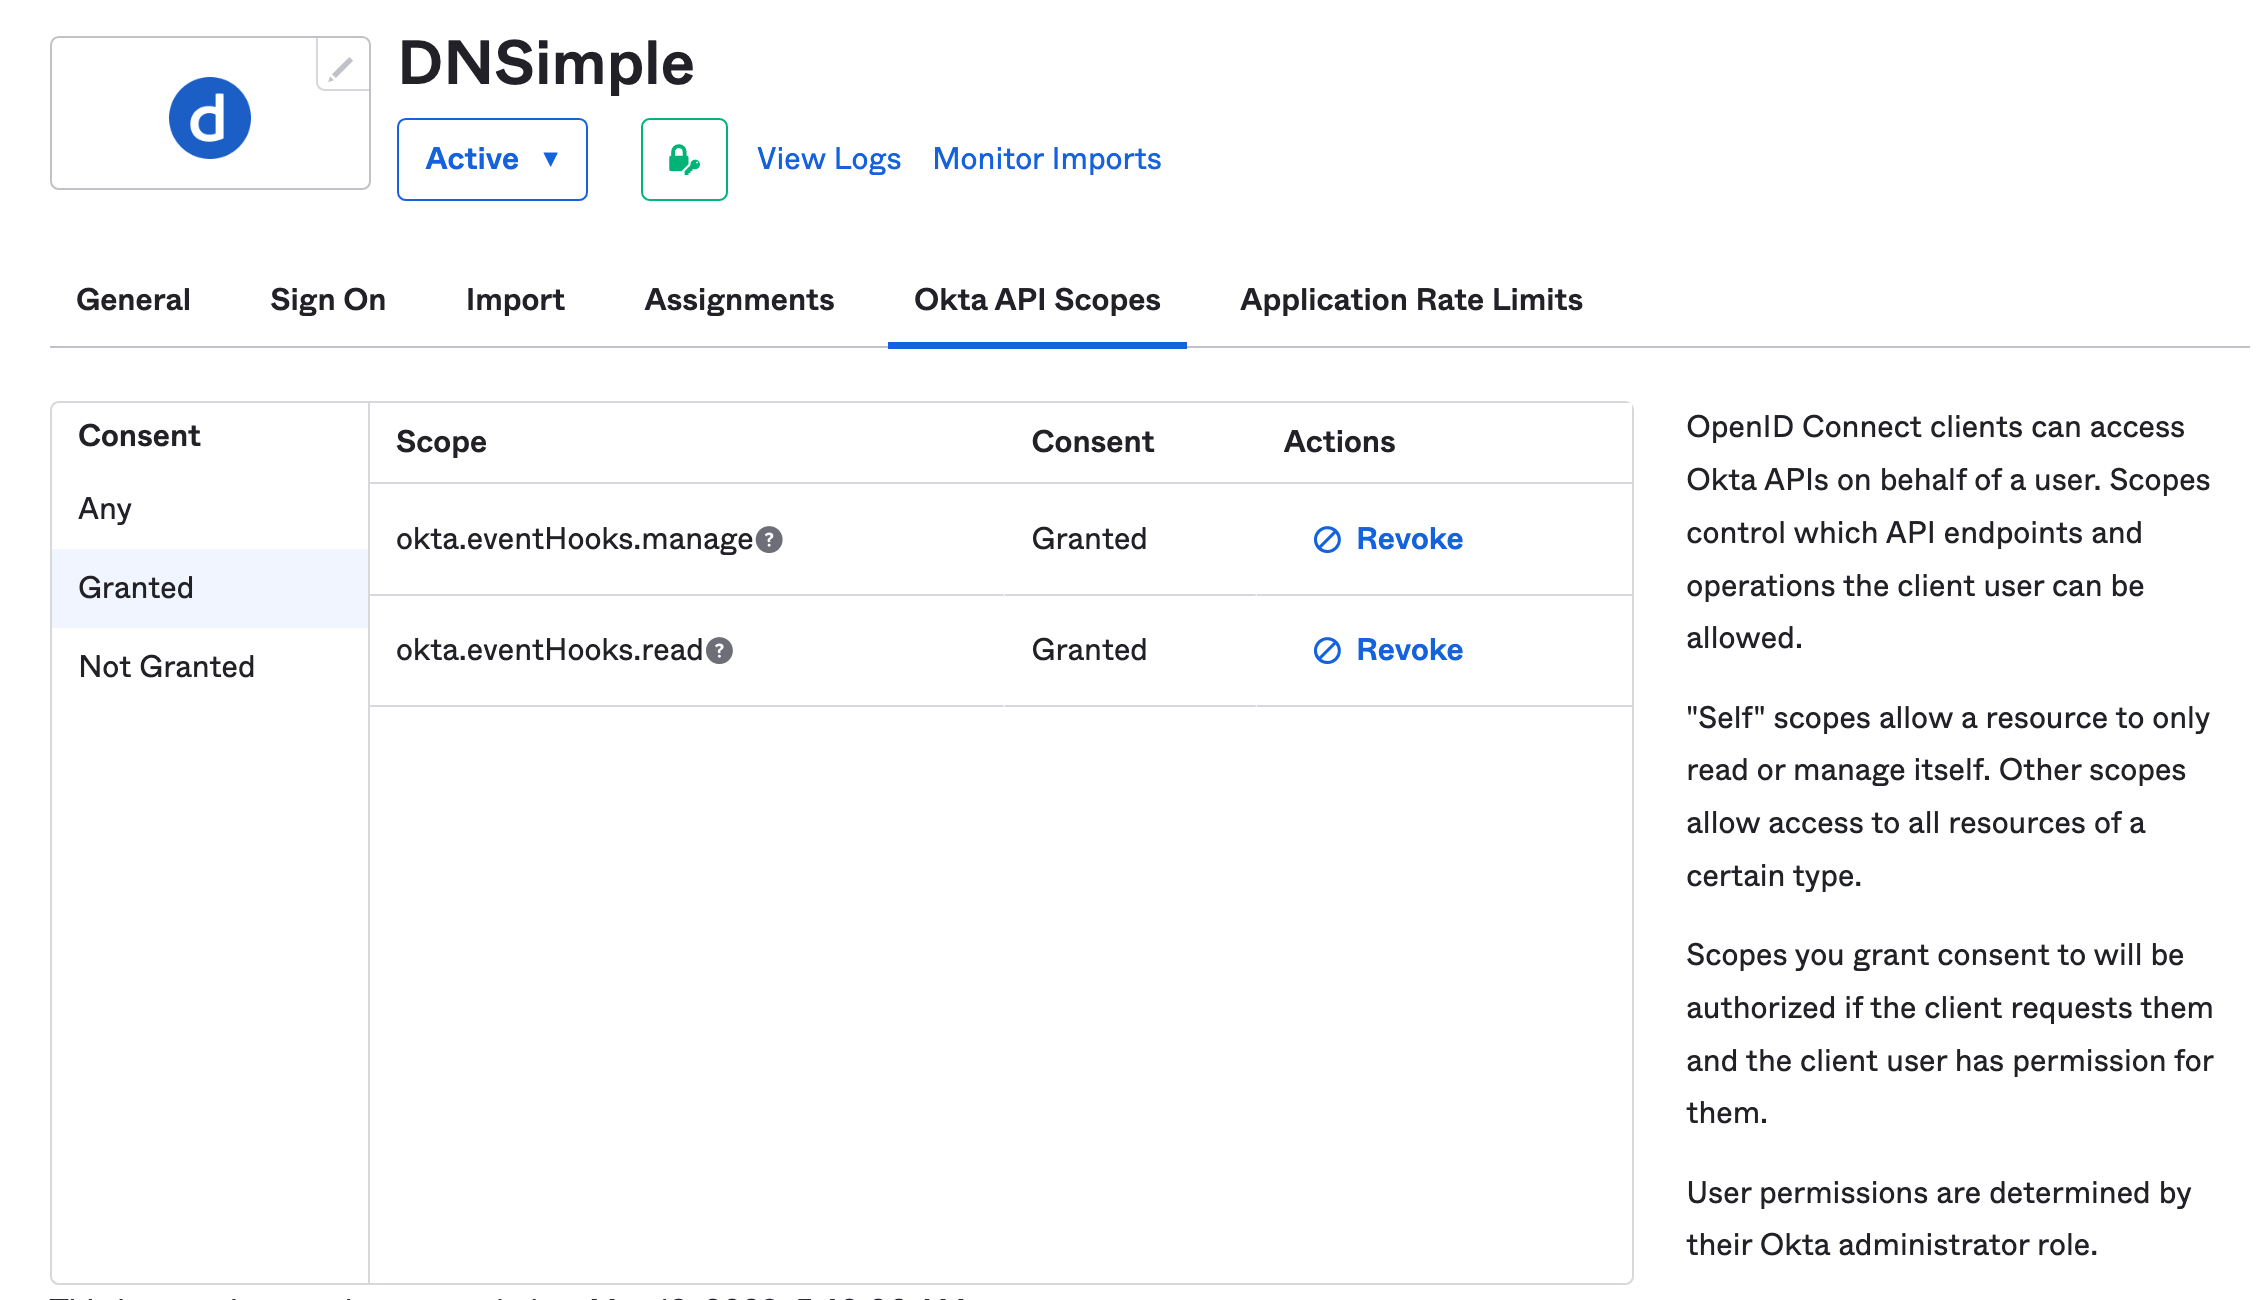
- Click the Okta API Scopes tab. Look for the okta.eventHooks.manage and okta.eventHooks.read scopes, and click Grant for each of them. Make sure to verify they’ve been granted. Read more about configuring settings and API scopes in Okta .
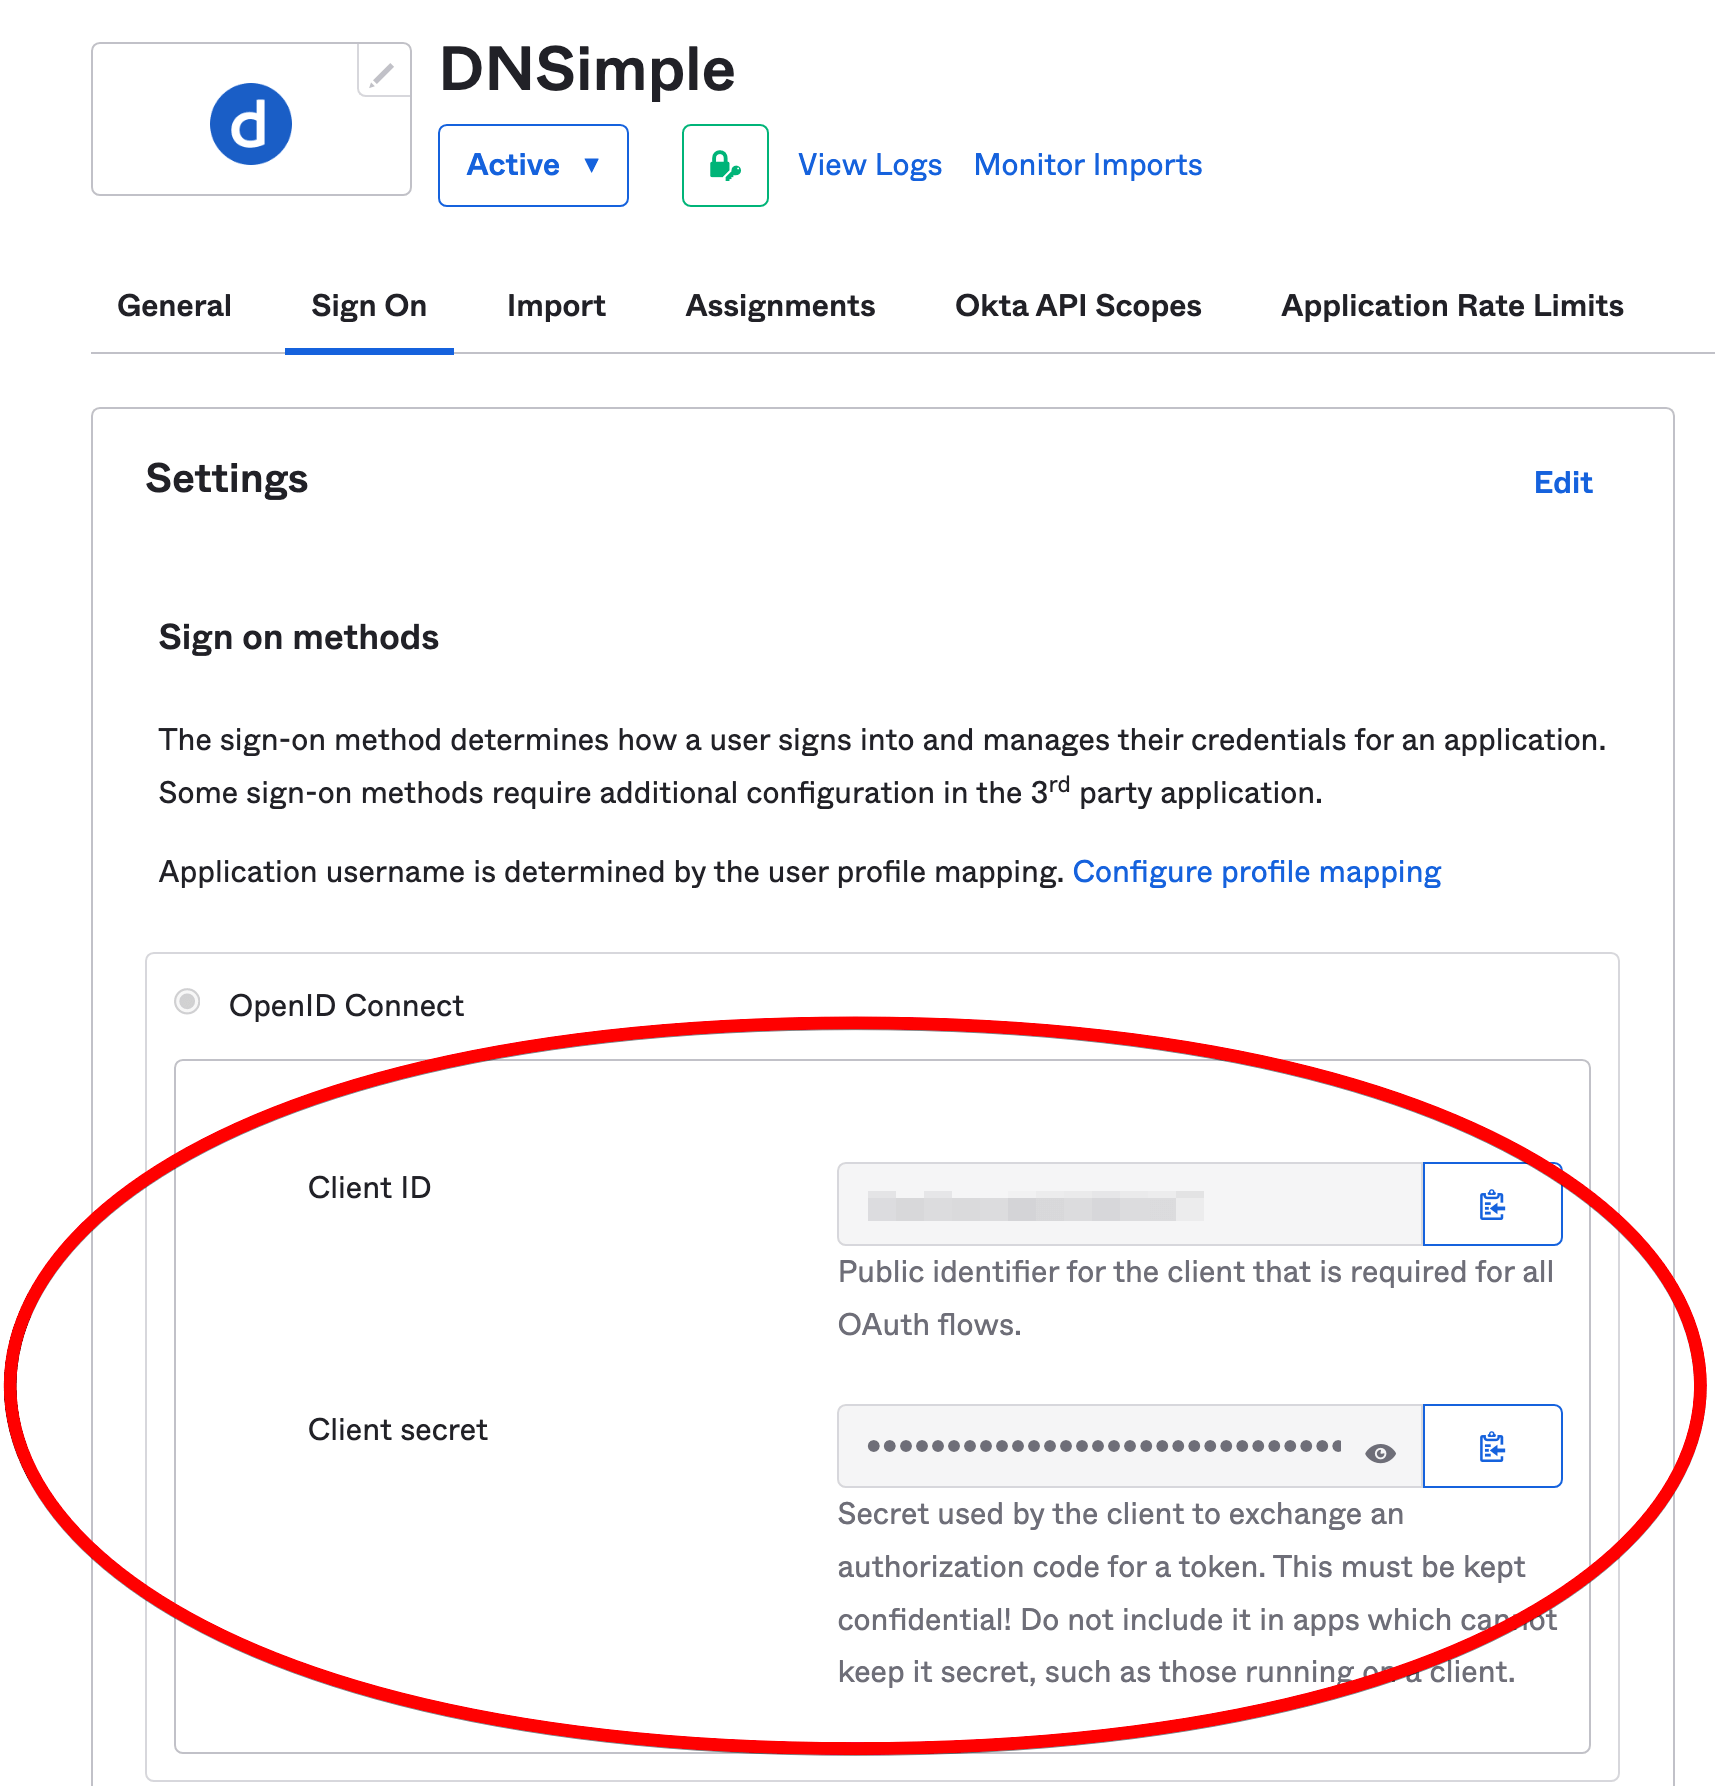
- Click the Sign On tab. Note the client ID and client secret, as you will need them to configure DNSimple for Okta SSO.
Configuring DNSimple for Okta SSO
Note
These steps are performed in your DNSimple account.
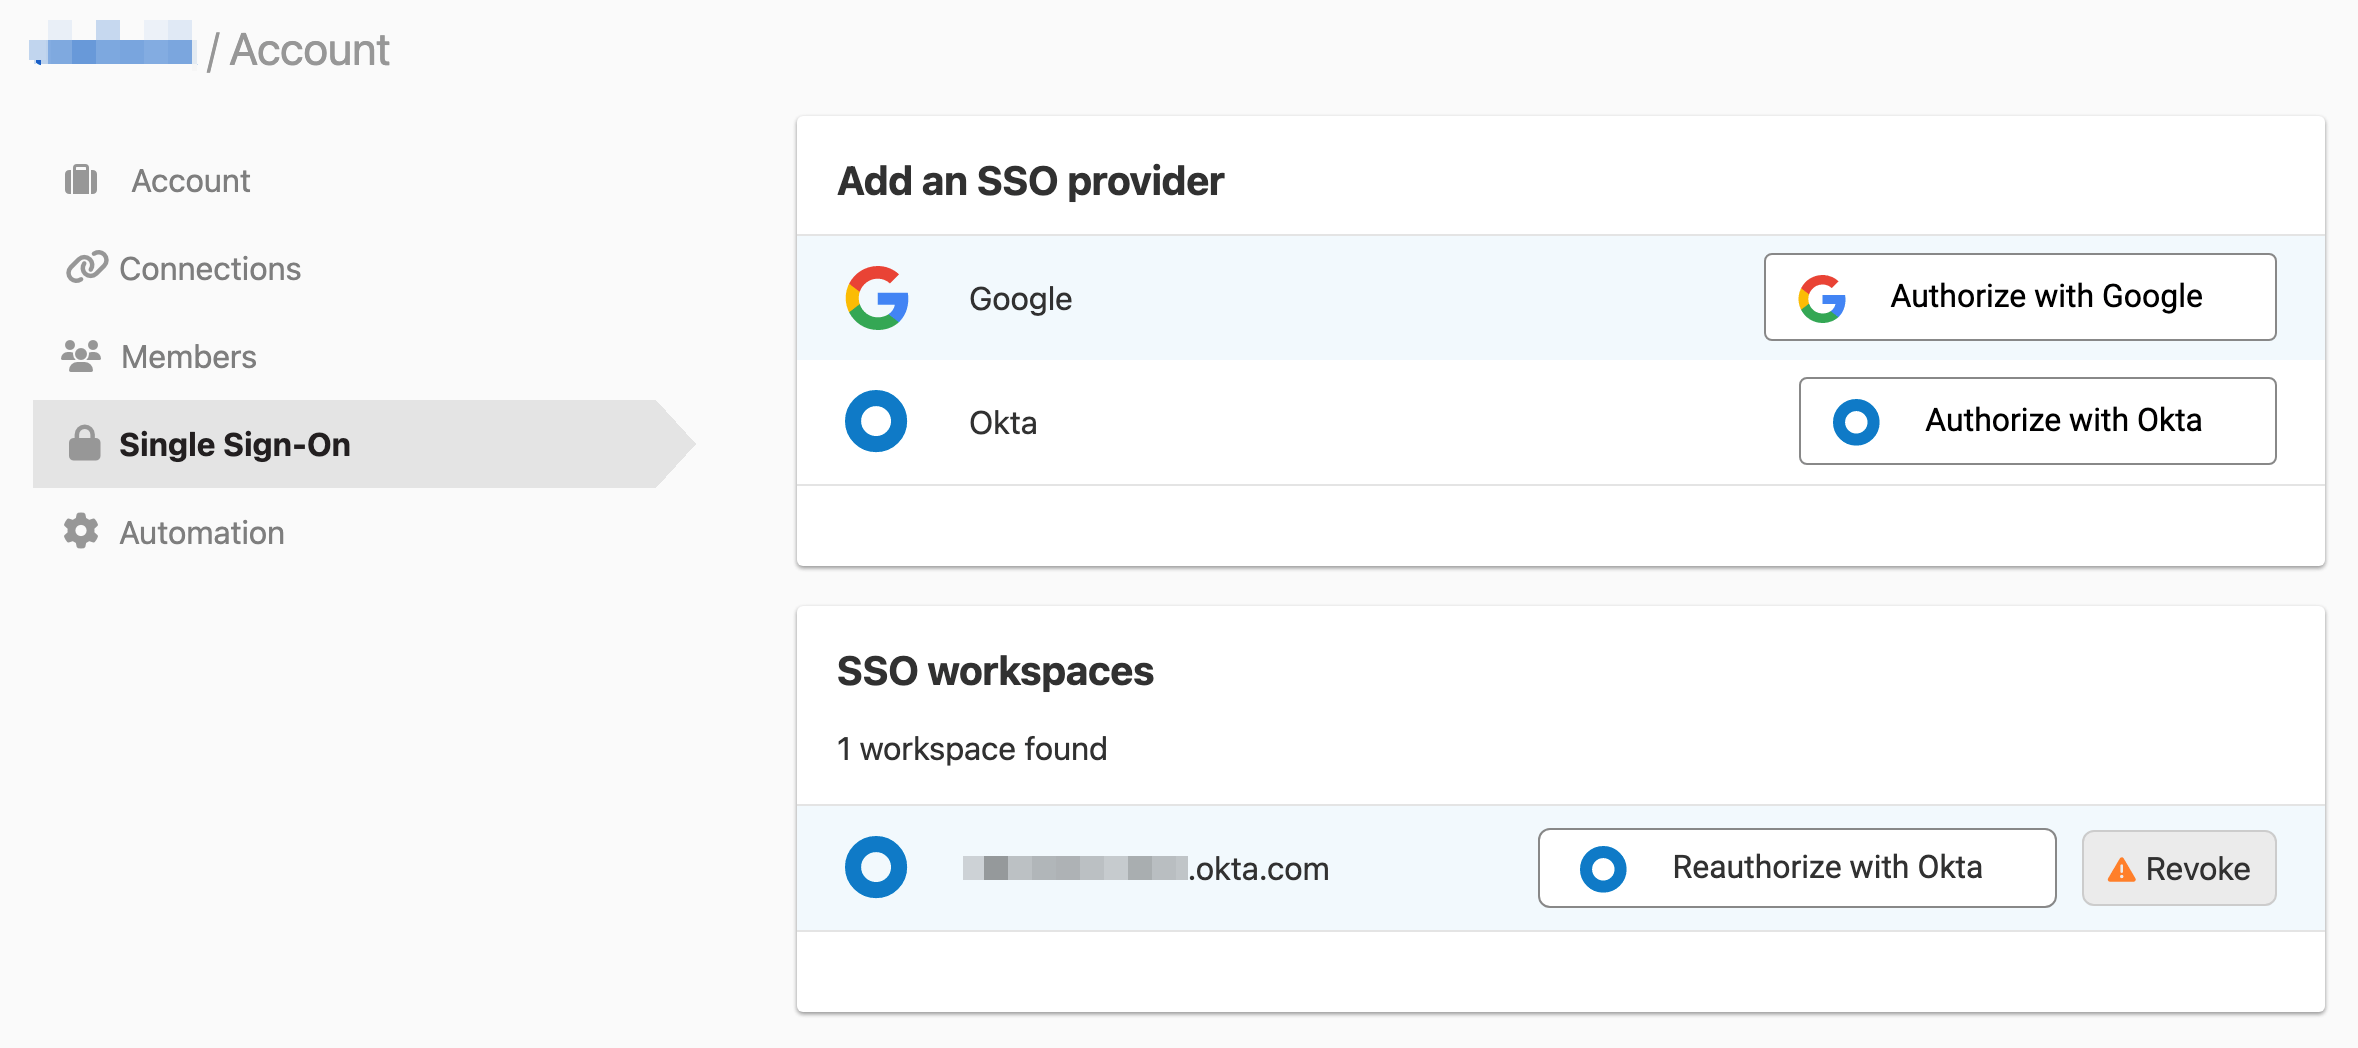
- At DNSimple, go to the Account page, and click the Single Sign-On tab.
- Click Authorize with Okta to authorize the Workspace.
- Fill in the Okta domain, client ID, and client secret, then click Link. You’ll need to log in to the Okta Workspace with access to the
okta.eventHooks.manageandokta.eventHooks.readscopes. Your Okta user needs to already be assigned to the DNSimple app integration in Okta with an email address that matches your DNSimple user email address.
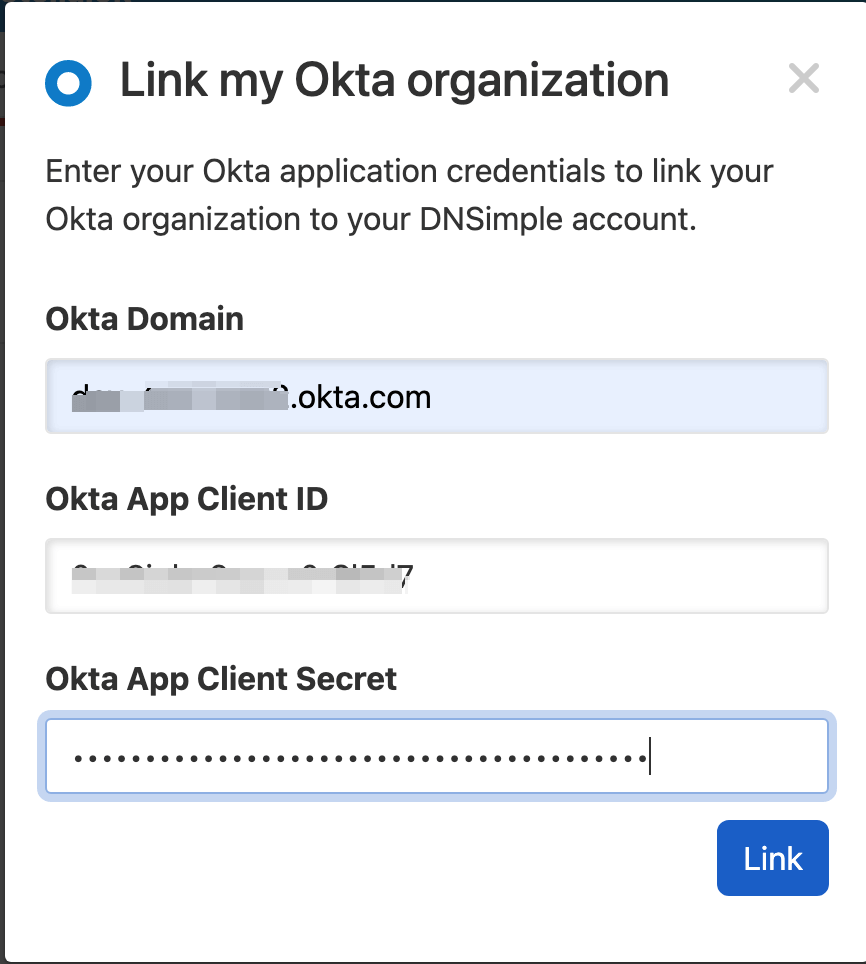
- After logging in via Okta, you will arrive back on the DNSimple Single Sign-On page with Okta SSO enabled for the account.
- Repeat the process for each account where you want Okta SSO enabled.
When configuring Okta SSO, DNSimple creates an event hook in the Okta organization to listen and react to membership changes. If multiple configurations are made to the same Okta organization, only a single hook is created.
If the Okta app is no longer linked (e.g. the access token is revoked or the event hook is removed), you can re-link the Okta application by clicking Reauthorize with Okta.
Assigning people or groups
To give people access to DNSimple, click Assignments under the configured DNSimple app in your Okta dashboard. Click Assign, and select the appropriate users.
If an assigned user does not already have a matching DNSimple user with the same email address, a DNSimple user will be provisioned for them, and the DNSimple account admin will receive a notification that they have been added.
If an assigned user already exists, they will need to link their DNSimple user to their Okta identity on the User Settings page within DNSimple before they can log in to DNSimple with their Okta identity.
The team members can now easily log in with their Okta identity. When you delete or suspend a team member from your company’s Okta organization admin, the corresponding member’s DNSimple access will be revoked automatically, reducing the administration requirements for your organization.
Access control
You can set the level of DNSimple access for each member under the Members and seats tab in your DNSimple Account settings. For full details, visit Domain Access Control.
Linking a DNSimple user to an Okta identity
When a DNSimple user exists in a DNSimple account before SSO is enabled, they will be required to link their Okta identity to verify ownership of both DNSimple and Okta user accounts. This is done in your DNSimple user settings.
To link a DNSimple user to an Okta identity:
- Go to your User Settings page.
- Scroll down to the Identities card, and click Add next to the Okta identity provider.
- Authenticate your Okta account.
- You can now log in to DNSimple using the linked Okta identity.
Logging in via Okta
You’ll need to link an Okta organization to your DNSimple account before your team members can log in via Okta SSO.
- To log in to DNSimple using Okta, visit https://dnsimple.com/login.
- Click Sign in using Okta.
- Enter the company’s Okta domain and click Sign in.
- If you are prompted for your Okta username and password, enter them.
- If your credentials are valid, you will be redirected back to DNSimple and logged in.
If you are not yet a member of the DNSimple account, the account administrator will receive a notification to grant access. Once they have granted access, you will be able to see the DNSimple account’s assets.
If you log out of Okta, you will also be logged out of DNSimple.
Unlinking an Okta organization from a DNSimple account
- Go to the Account page, and click the Single Sign-On tab.
- Click Revoke next to the SSO workspace you want to remove.
Unlinking a DNSimple user from an Okta identity
- Go to the User Settings page.
- In the Identities card, click Remove next to the linked identity.
Have more questions?
If you have any questions about using Okta SSO with DNSimple, just contact support, and we’ll be happy to help.